Rows (Columns)
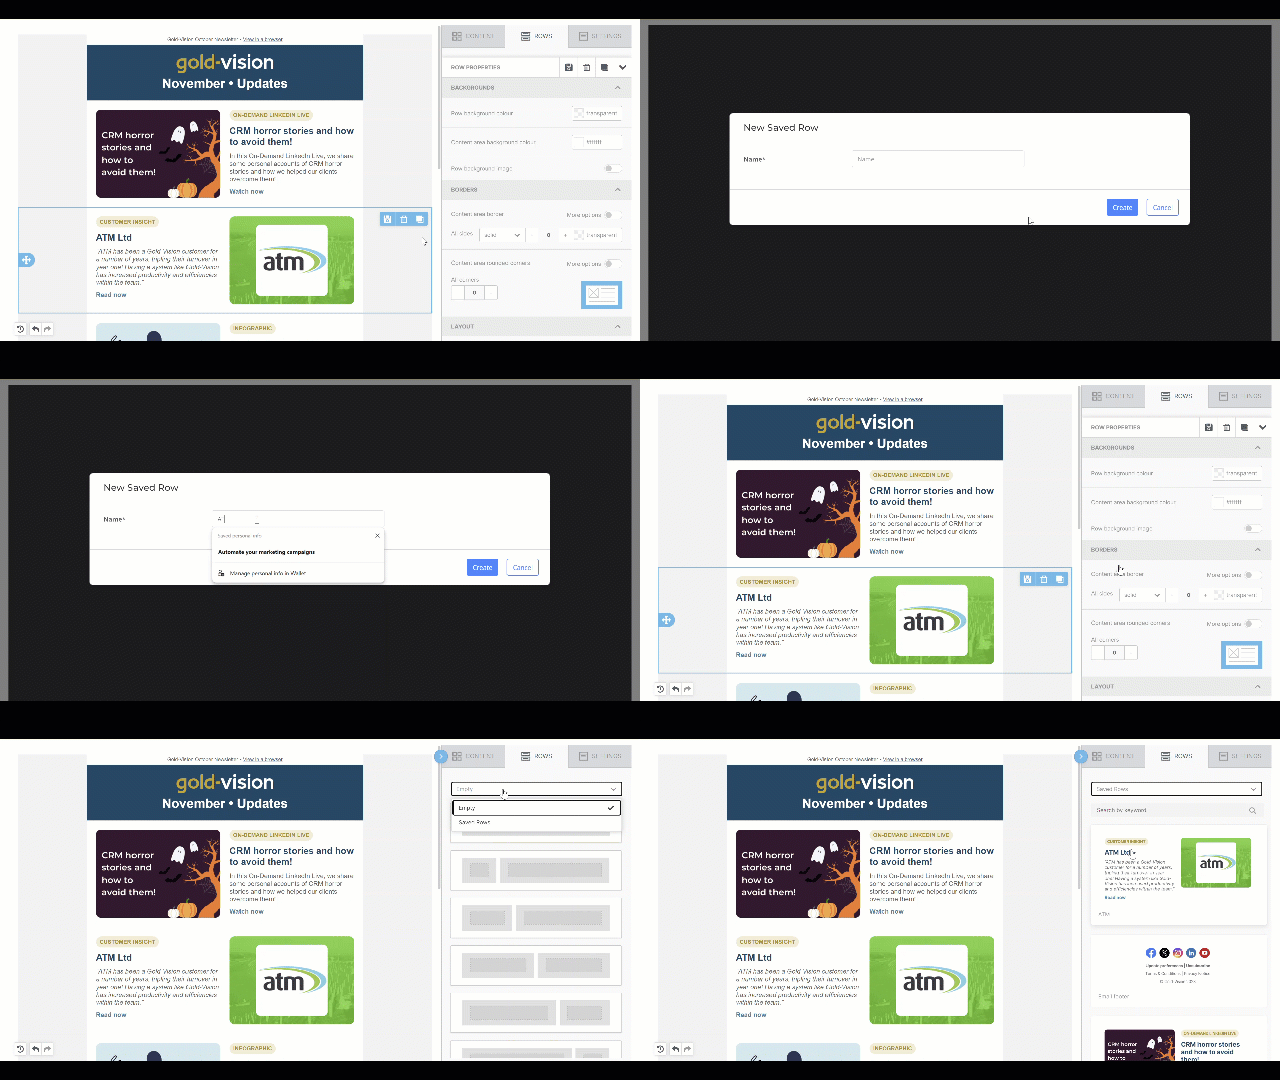
To add columns to your mailer, click on the Rows option on the righthand side. From this view you will be able to pick a pre-formatted column template by setting the drop-down menu to ‘Empty’ and dragging your chosen template over to the design space.
You can edit columns by clicking on the row and viewing Row Properties. Here you can change column size, background colour, padding and borders.
Saved Rows
To create a saved row, hover over your block and select the save button. Name your saved row, and click on create.
To use a saved row, click on the row option on the righthand side of the designer, and change the dropdown to Saved Rows. Here you will see a library of your saved rows which are ready to be dropped into your template.


 Related articles