
Brand Settings
Make Gold-Vision look like your business. Upload your logo, set your colours and see the result on desktop and mobile before anyone else does. Your users get a CRM that feels like yours, not ours.
Opening Brand Settings
Go to Settings > Branding Settings.

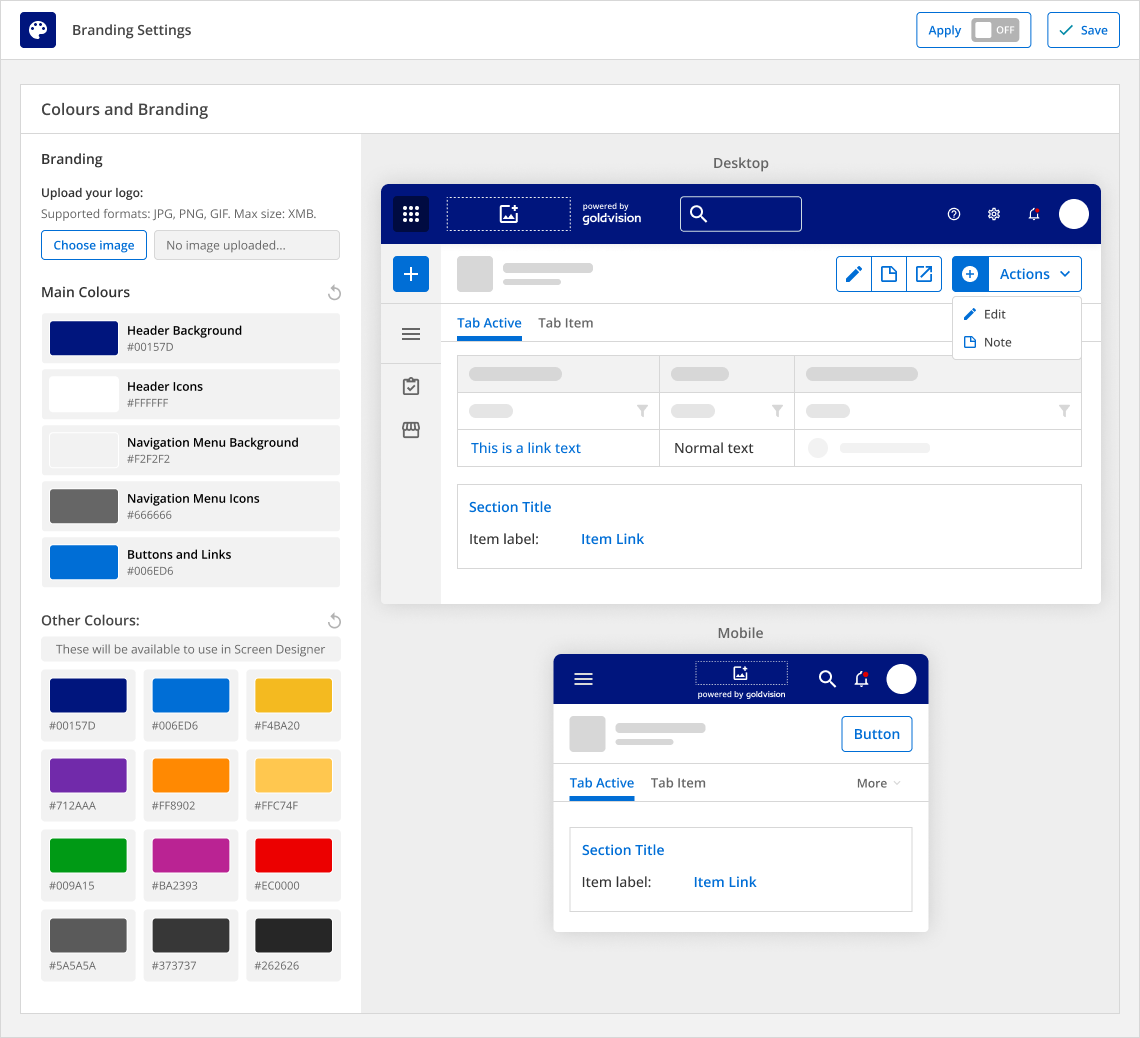
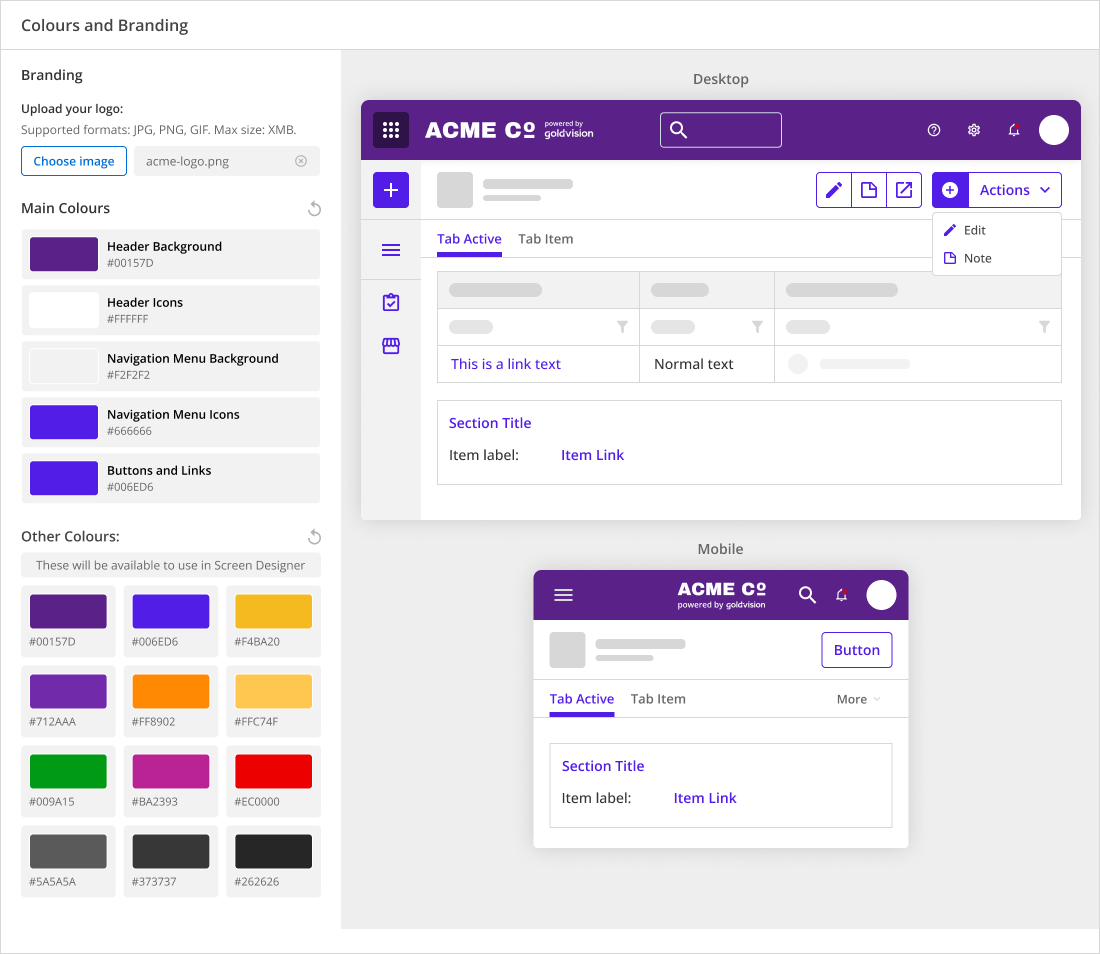
You’ll see the Colours and Branding screen.
Your settings sit on the left. A live preview sits on the right, showing how Gold-Vision will look on desktop and mobile.
 Note
Note
Only administrators can change branding. Your changes apply to every user once you switch them on.
Uploading Your Logo
Your logo replaces the Gold-Vision logo in the top bar, with a small “powered by Gold-Vision” mark beside it.
- Under Branding, click Choose image
- Pick your logo file and click Insert.
- Check the preview on the right.

 Tip
Tip
A logo with a transparent background (PNG) looks cleanest on a coloured header.
Setting Main Colours
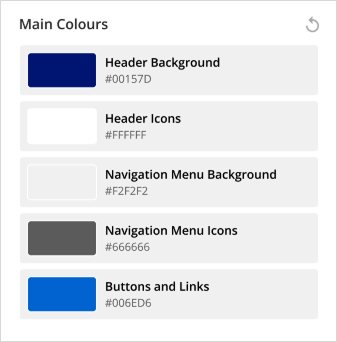
Main Colours control the core look of Gold-Vision. There are five:
-
Header Background
Set the background colour of the top bar behind your logo and search -
Header Icons
Set the colour of the Help, settings, notification and profile icons in the top bar -
Navigation Menu Background
Set the background colour of the left-hand menu -
Navigation Menu Icons
Set the colour of the icons in the left-hand menu -
Buttons and Links
Set the colours of buttons, links, active tabs and highlights
Changing Main Colours
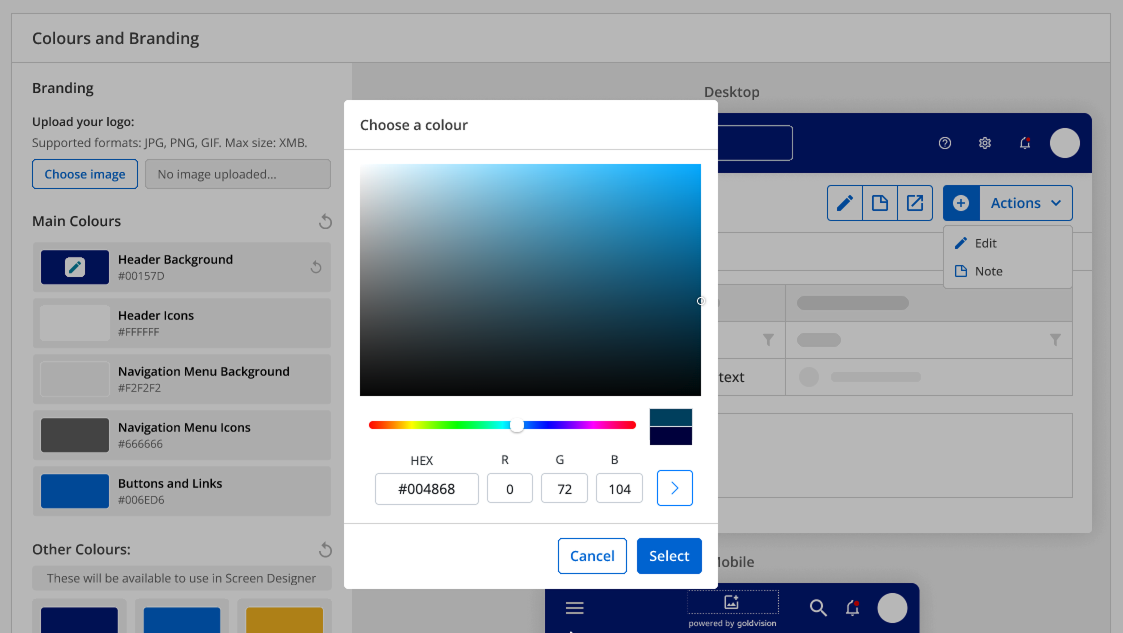
- Hover over the colour and click Edit.
- Pick a new colour, or type its hex code.
- Click Select. The preview updates straight away.
Setting Other Colours
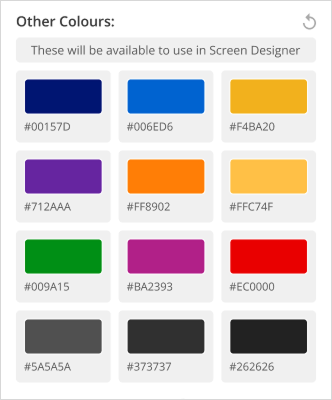
Other Colours is your palette of 12 extra colours. They don’t change the main screens. Instead, they’re available to pick in Screen Designer, so sections and highlights can match your brand.
Edit and reset them the same way as Main Colours. To put all 12 back to the defaults, click the reset icon next to Other Colours, then Yes.
Undoing your changes
To undo a single colour, hover over it and click Reset. To put all five back to the Gold-Vision defaults, click the reset icon next to Main Colours, then Yes.

Previewing Your Branding
The preview shows your logo and colours on a sample desktop screen and a sample mobile screen. It updates as you work, so you can try ideas without your users seeing a thing.
Tip
Check the mobile preview too. A logo that fits the desktop header can feel cramped on a phone.
Applying Your Branding
Saving and applying are separate, so you can get things right before going live.
- Click Save to keep your logo and colours. Nothing changes for your users yet.
- When you’re ready, switch the Apply toggle to On.
- Click Yes to confirm. Your branding now shows for everyone.

Switching Branding Off
Switch the Apply toggle to Off and click Yes. Gold-Vision goes back to its default look. Your saved logo and colours stay put, ready to switch back on.

Note
Resetting colours and switching branding off are different. Reset changes your saved colours back to the defaults. Switching off just hides your branding.
 Related articles