Account Portal Management
Creating a new space
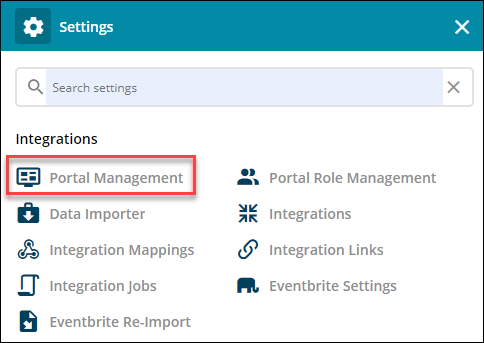
In the Settings area search for Portal Management.
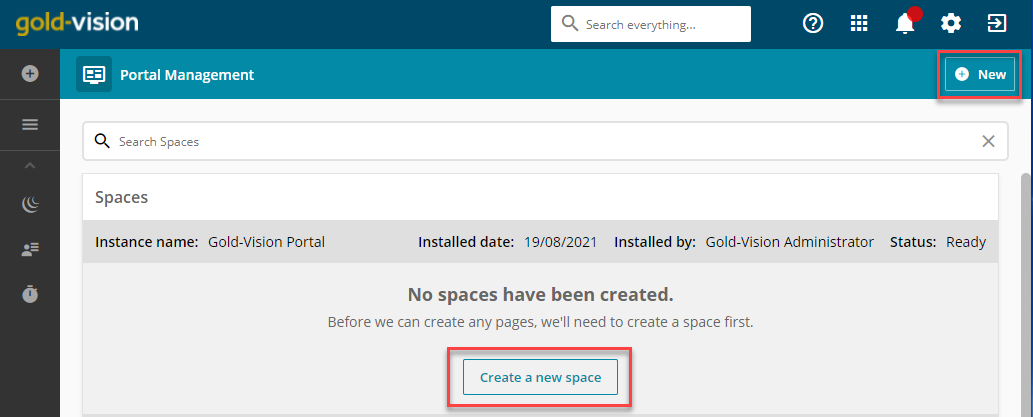
Click the New button or the Space Designer button to create a new space.
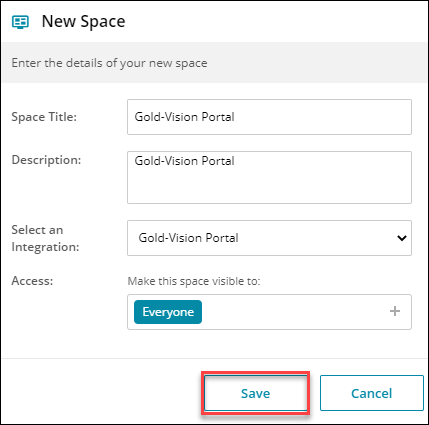
Add a Space Title and Description
Select the integration (if you have more than one)
Access – who do you want to view the space (see below re users and user roles)
Click the Save button.
Space Designer
The Space Designer enables you to setup pages, add styling options and manage your space settings
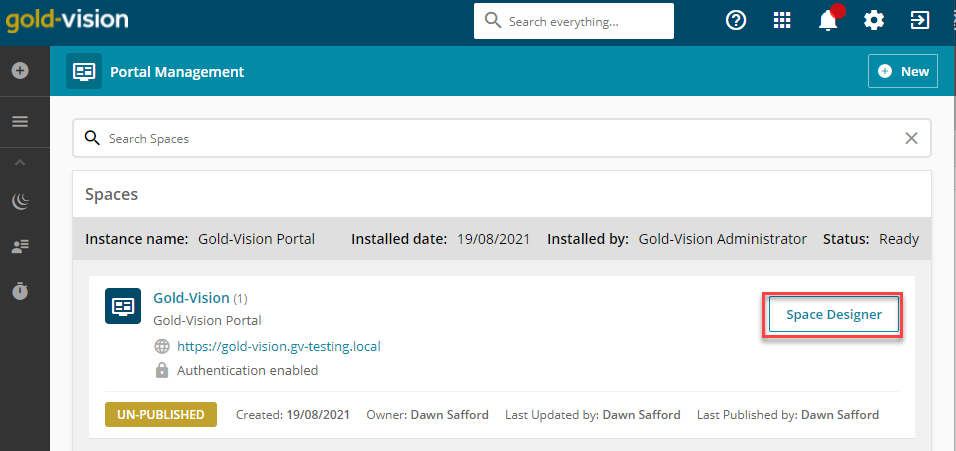
Click on the Space Designer button.
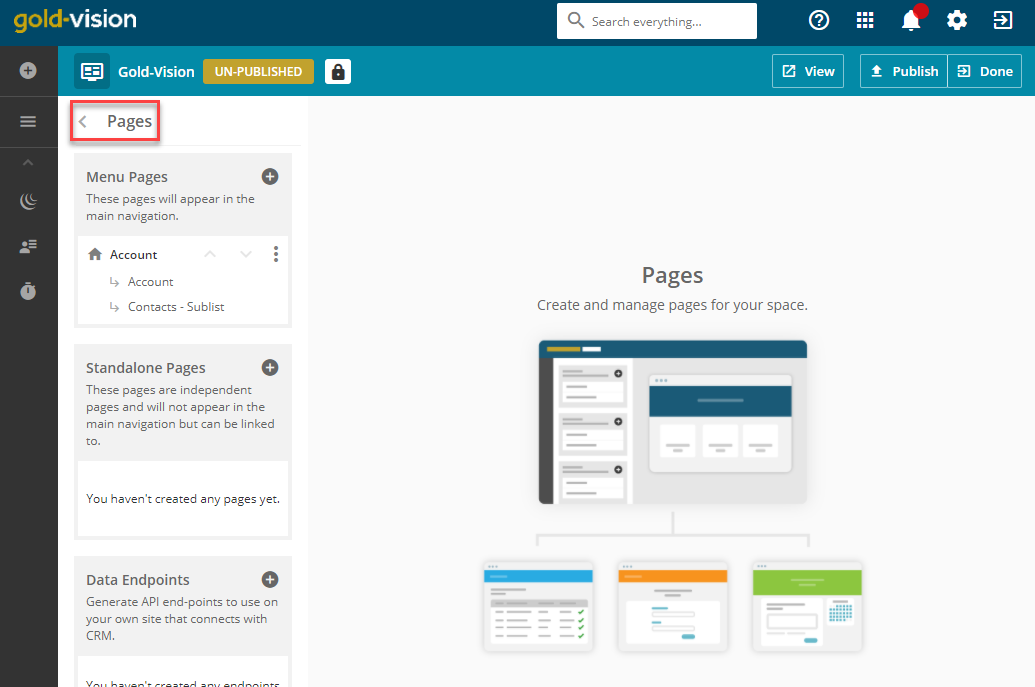
Pages
You can now create pages for your portal.
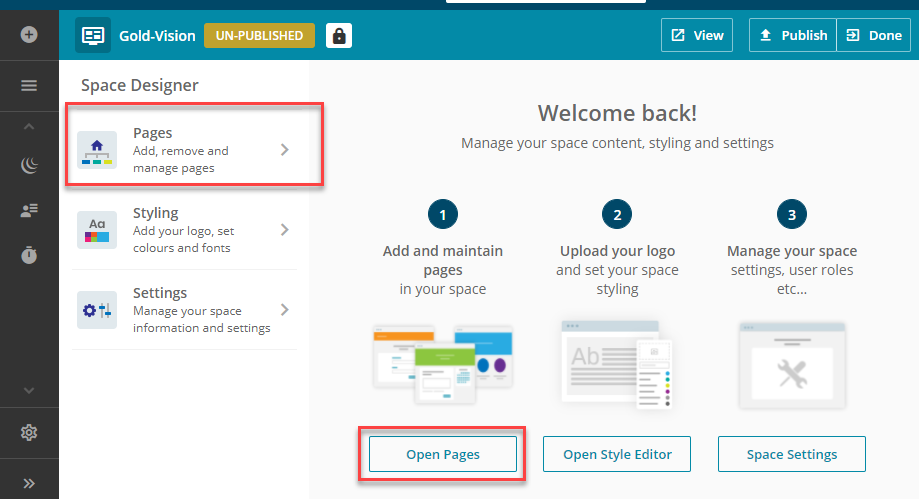
Select the Open Pages button or click on Pages.
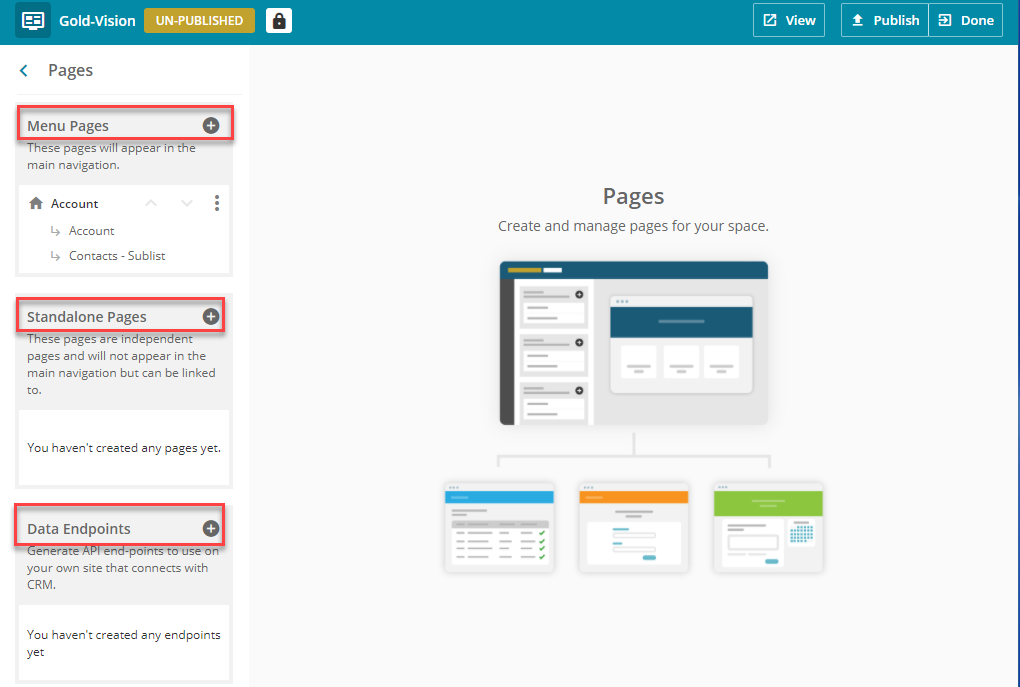
Here you click on the Plus Icon to add:-
Menu Pages – Pages which will appear on the main navigation.
Standalone Pages – These pages can be linked and do not appear in the main navigation.
Data Endpoints – You can add API end-points to use on your own site which connects with Gold-Vision for example Leads.
To add a Menu Page
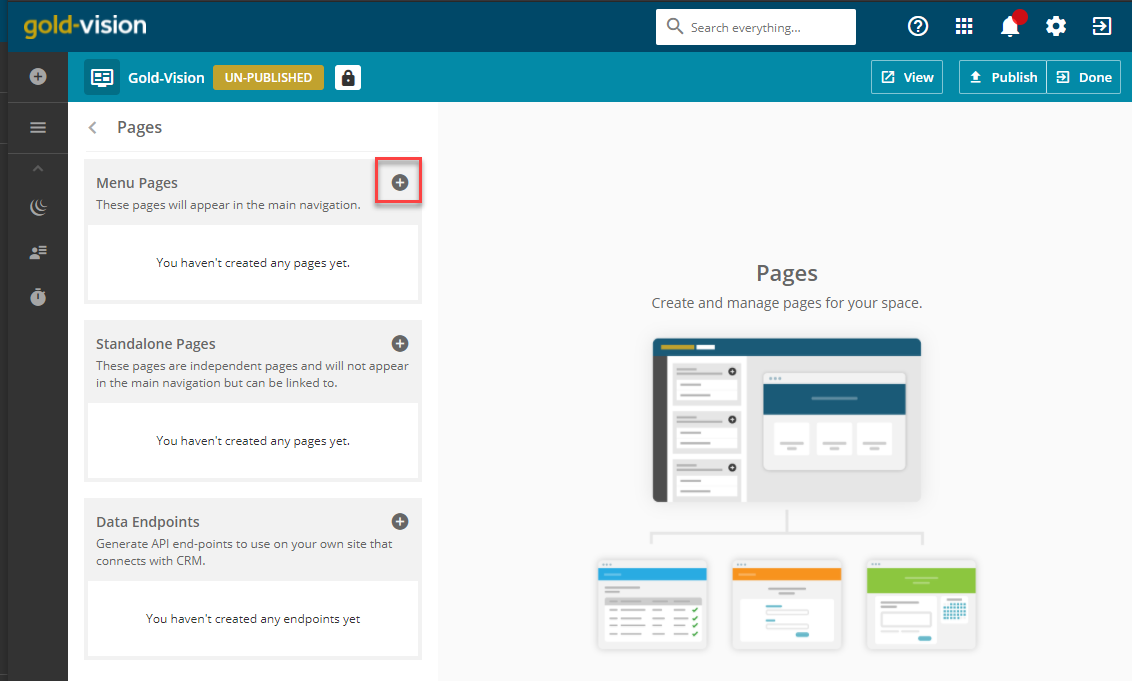
Click on the Plus icon.
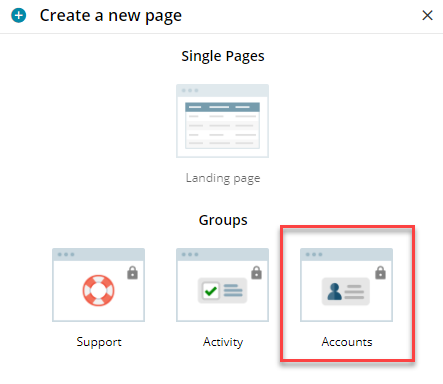
In groups select Accounts.
Menu Title – enter a title which will appear in the portal navigation eg. Account.
Access – allows you make the space visible to contacts with the user roles selected.
Editable Roles– allows you make the space editable to contacts with the user roles selected.
Restrict Access by Contact ownership – allows you to restrict access ??????.
Set as homepage – you can set a homepage which will be the first page the users will see when they access the portal.
Click the Create button and Save.

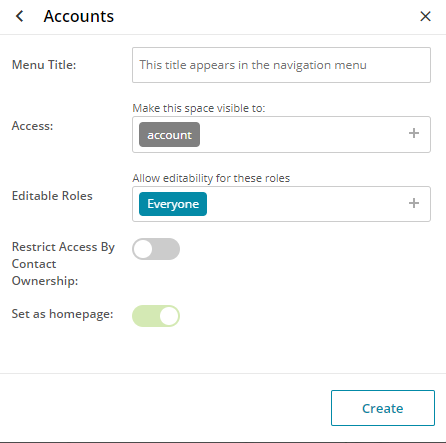
The Account Settings tab will be displayed.
Page Settings
You can amend your Page Properties and user roles who can view or edit details on the page.
Menu Title – enter a title which will appear in the portal navigation eg. Account.
Access – allows you make the space visible to contacts with the user roles selected.
Set as homepage – you can set a homepage which will be the first page the users will see when they access the portal.
Editable Roles– allows you make the space editable to contacts with the user roles selected.
Restrict Access by Contact ownership – allows you to restrict access ??????.
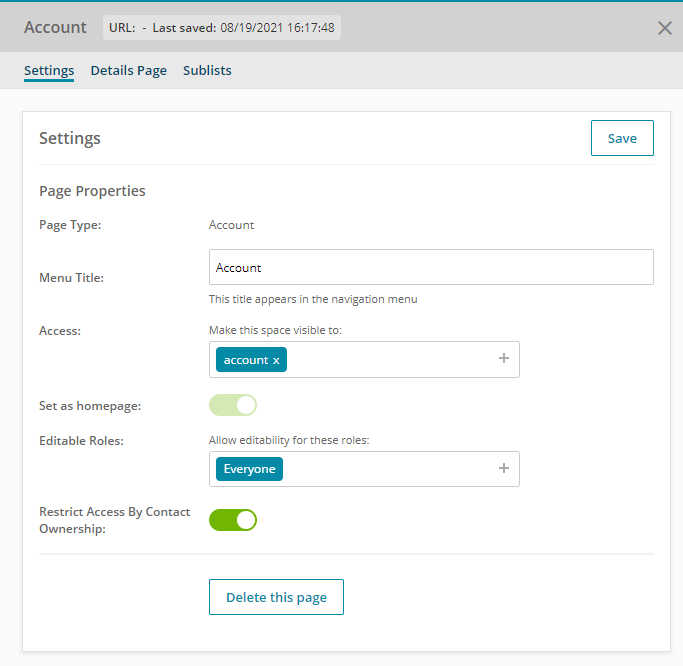
Adding Additional fields
You can add additional fields to your page.
For example you may want customers to be able to view and edit specific details i.e. update a job titles or email addresses, when using the Account portal.
Click on the Details Page tab.
Default Fields – The Account Name will be displayed by default and you can click the toggle to make the field editable.
Additional Fields – Click on the Add Field button to select additional fields and set the editable option as required. The fields will appear in the ‘Portal Page’ and will synchronise with the fields in Gold-Vision Account.
When complete click the Save button.
 Info
Info
Please Note – where a list of options is available you can choose to hide selected options.
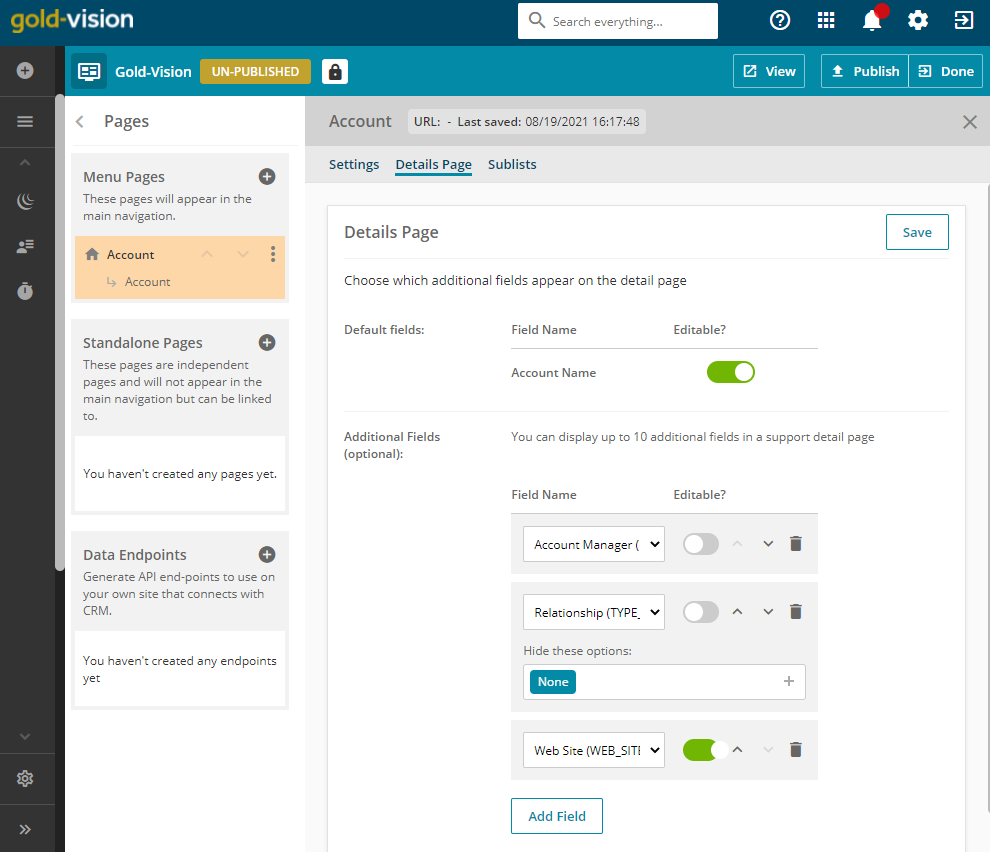
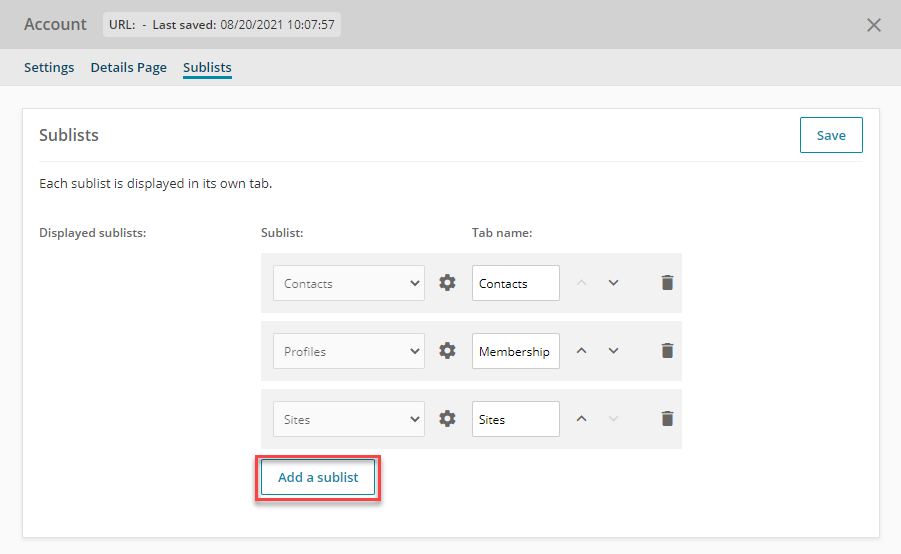
Adding Page Sublists
You can add additional tabs to display Contact, Site and/or Profile details on the Account portal.
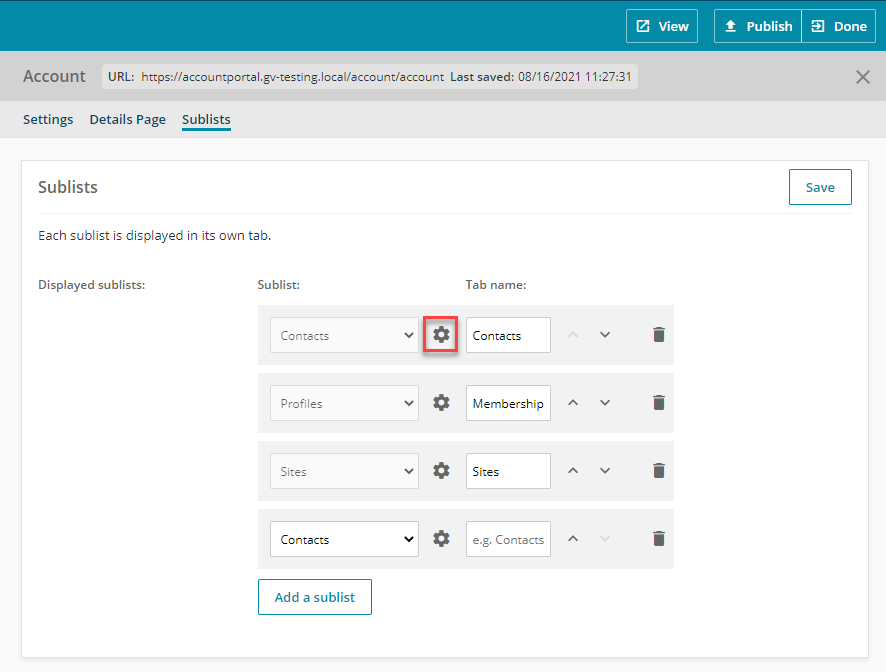
Click on the Sublists tab then click the Add a sublist button, select the sublist option required.

Enter the Tab name which will display in the Account Portal.
For each option you can go into Settings to Configure Sublist
Configure Sublist
The Sublist Settings tab will be displayed.
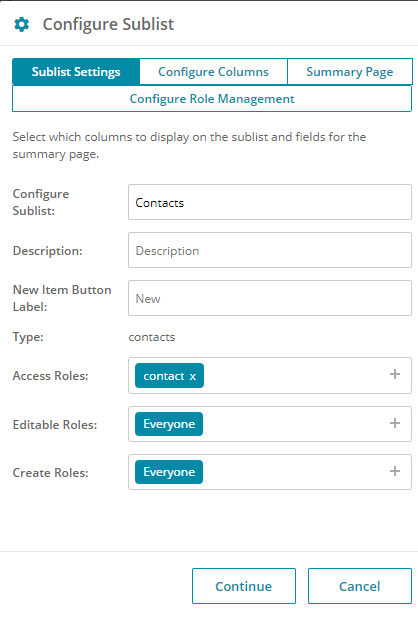
Configure Sublists – the sublist name will be displayed and can be amended.
Description – enter or amend the description.
New Item Button Label – you can amend the new item button label if required.
Type – the sublist type will be displayed by default.
Access Roles – allows you make the space visible to contacts with the user roles selected.
Editable Roles– allows you make the space editable to contacts with the user roles selected.
Create Roles – allows contacts with the user role selected to create new roles.
Click the Continue button to save or click the Configure Columns tab to add columns to the sublist and fields to the summary page.
Configure Columns
You can add Columns to the list and set filters.
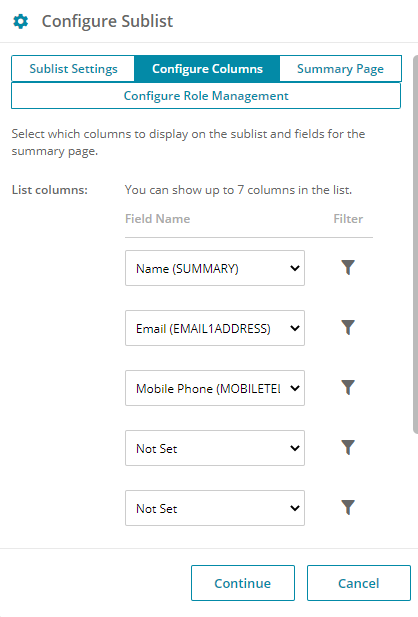
Click to select the Field Name required.
You can then click on the Filter Icon to set a default Filter against each field if required.
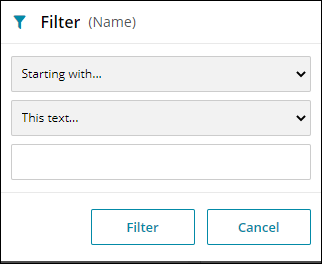
For example – add an example of a filter.
Click the Continue button to save or click the Summary Page tab to add fields to the summary page.
Summary Page
You can add additional fields to display on the summary page.
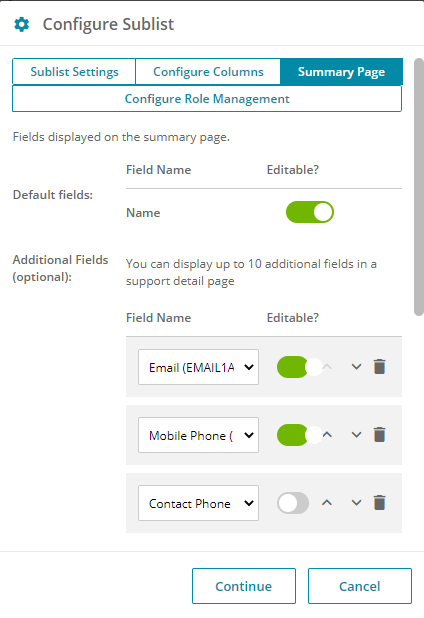
Default Fields – the Default Field Name will be displayed and you can click the toggle to make the fields editable.
Additional Fields – click on Add Field button to select additional fields and set the editable option as required. The fields will appear in the ‘Portal tab’ and will synchronise with the fields in Gold-Vision Account.
Click to select the field names required and click on Continue to save.
Configure Role Management
This option is only available on the Contacts sublist and allows you to manage access to the role management section in the portal.
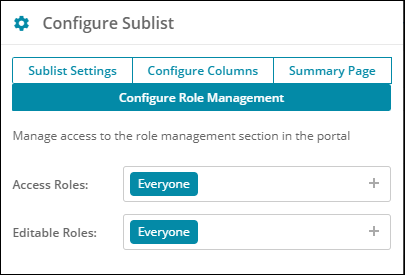
Access Roles – allows you make the role management area visible to contacts with the user roles selected.
Editable Roles – allows you make the role management area editable to contacts with the user roles selected.
Click the Continue button and then the Save button.
Styling
You can style your portal page.
For example: you can add a logo, change the font and colours.
To do this from Menu Pages click on the Pages arrow in the top left hand corner.

Click on the Styling option or click on the Open Style Editor button to display the styling options.
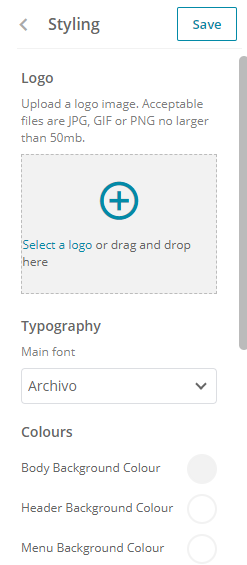
Logo – click to select or drag a logo to display on your portal page.
Typography – select the font required.
Colours – select the colours required for the various sections.
Click on the Save button.
Settings
You can amend the Portal settings.
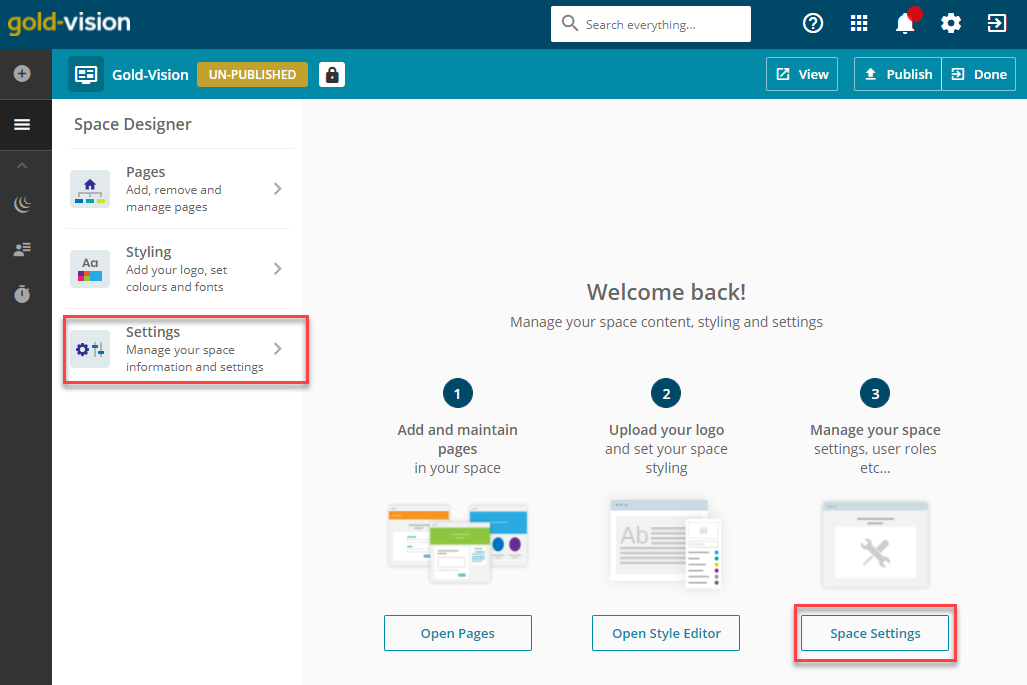
To do this click on the Settings option or click the Space Settings button.
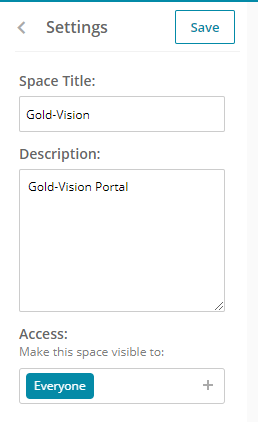
Space Title – you can amend the Space name.
Description – you can amend the Space Description
Access – make the space visible to the contacts associated with the roles.
Click on the Save button.
View the Portal

You can view the Portal at any time by clicking on the View button.
Publish the Portal

To make the portal available click on the Publish button.