Configuring Time
To configure Time, Administrator users will have to define the working day hours in the Settings area and Screen Design the Time section onto the required Gold-Vision Records
This video will show you how to configure Time and below you have step by step instructions as well:
Setting up a Standard Working Day
The initial setup is quick and easy. Go to Settings then search for Time to display the general Time Settings window:
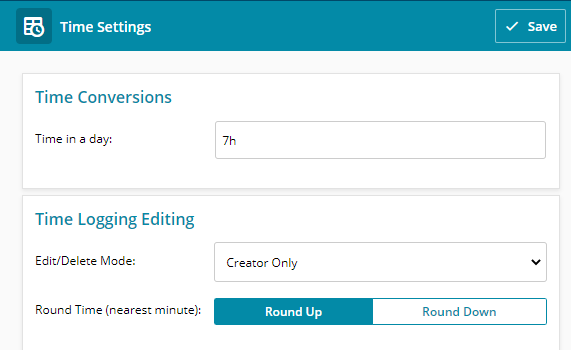
- Creator Only
- Creator Only – within 24 hours of creation
- Creator Only – within 7 days of creation
- All Users
- Disabled
How to Screen Design Time Section
Only Configuration and Administration Managers will have access to the Screen Designer. You may need to contact them for some assistance if you do not have access to this area.
 Note
Note
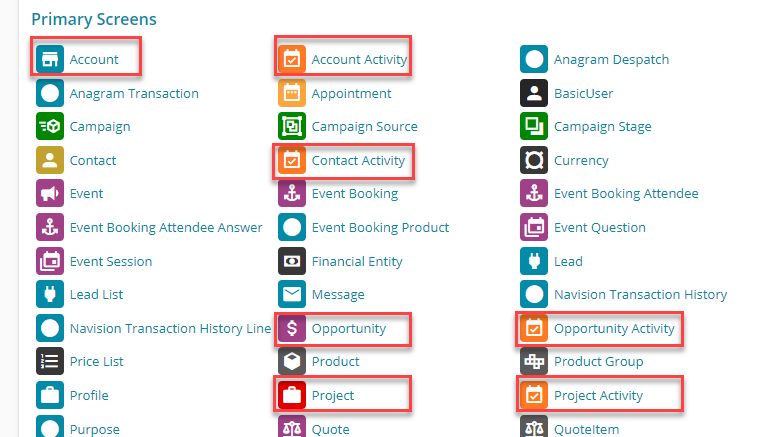
The above fields can be added to the following items – Account, Account Activity, Contact Activity, Opportunity, Opportunity Activity, Project or Project Activity .
At the bottom of the Screen Designer select New Section and Add Time Section.
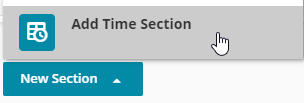
The New Time Section window will be displayed.

From here you can click on the Ellipsis Icon to select Configure.
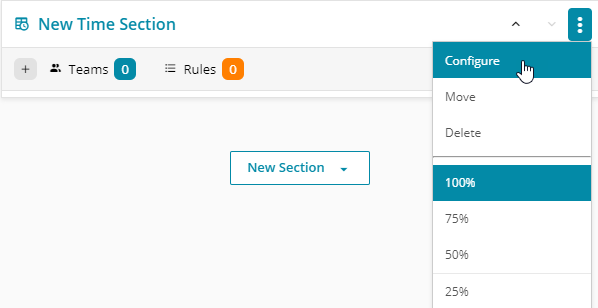
From here you can click on the Name to rename the section and tick Time Setting options to display Time and/ or Units Data.
The Visibility allows you to select who can view this section.

- Actual Time
- Actual Units
- Estimated Time
- Estimated Units
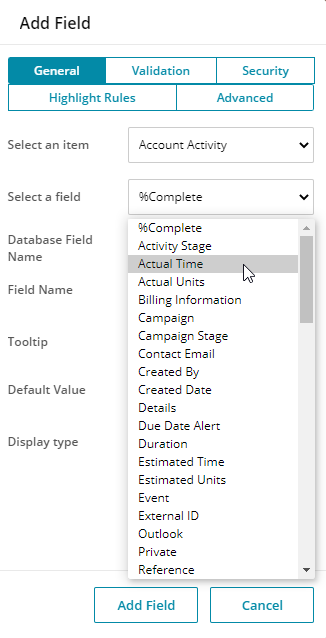
Click on Add Field then save your Screen Design.
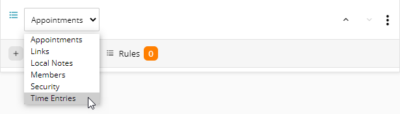
How To Screen Design Time Entries list
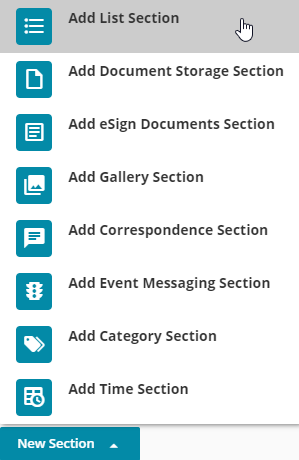
Go to Settings and select Screen Designer select the record you want to add the Time Entries list to and then add a New List Section
Configuring Widgets
You can also configure Widgets in Screen Designer, click on the New Section and Select Add Overview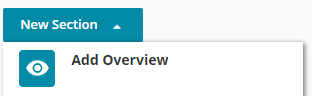
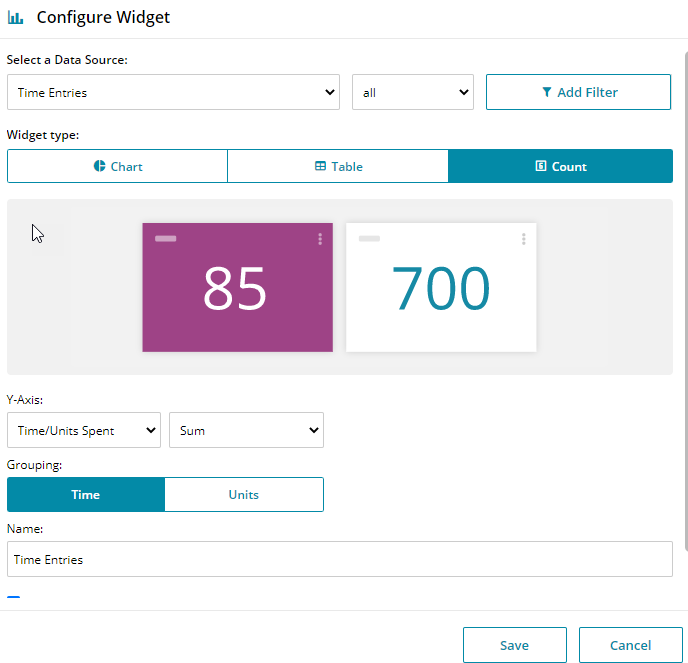
You can then click on the Create New Widget button then Select a Data Source of Time Entries and select the Widget Type of Count.
 Tip
Tip
For more information please visit Configuring Your Screens
 Related articles