Configure Account Page
Once you have installed your Portal it’s now time to Configure your Account Pages
Account Pages are designed to display data from your Gold-Vision Accounts, Contacts, Sites & Profiles:
- Contacts – ideal as a self service area for users to add new Contacts, amend job titles, contact details and user preferences.
- Sites – an area where users can view, update and add new site details for example Delivery or Billing addresses.
- Profiles – are ideal for managing licensees, warranty details, inventory of items and more.
Menu Settings
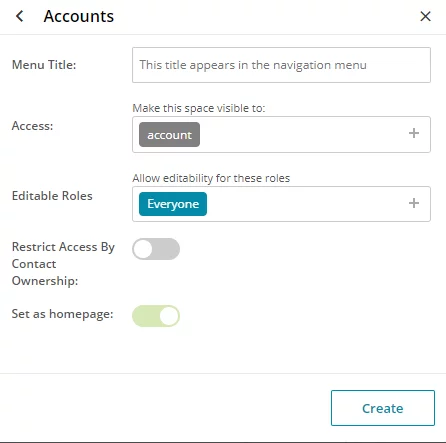
Menu Title – enter a title which will appear in the portal navigation eg. Account.
Access – allows you make the space visible to contacts with the user roles selected.
Editable Roles– allows you make the space editable to contacts with the user roles selected.
Restrict Access by Contact ownership – allows you to restrict access only to the Contact of the Gold-Vision record
Set as homepage – you can set a homepage which will be the first page the users will see when they access the portal.
Click the Create button and Save.
 Tip
Tip
To find out more about how to setup roles for access edit and create please visit Role Management page.
The Account Settings tab will be displayed.
Page Settings
You can amend your Page Properties and user roles who can view or edit details on the page.
Menu Title – enter a title which will appear in the portal navigation eg. Account.
Access – allows you make the space visible to contacts with the user roles selected.
Set as homepage – you can set a homepage which will be the first page the users will see when they access the portal.
Editable Roles– allows you make the space editable to contacts with the user roles selected.
Restrict Access by Contact ownership – allows you to restrict access only to the Contact of the Gold-Vision record
Adding Additional fields
You can add additional fields to your page.
For example you may want customers to be able to view and edit specific details i.e. update a job titles or email addresses, when using the Account portal.
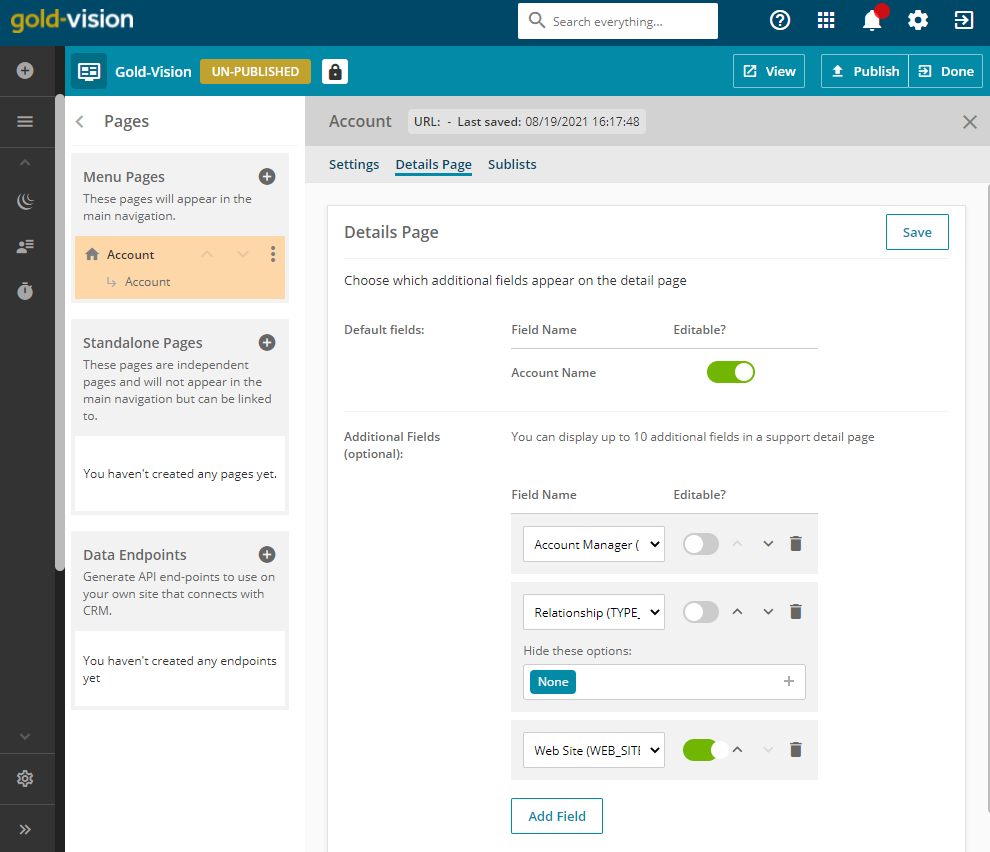
Click on the Details Page tab.
Default Fields – The Account Name will be displayed by default and you can click the toggle to make the field editable.
Additional Fields – Click on the Add Field button to select additional fields and set the editable option as required. The fields will appear in the ‘Portal Page’ and will synchronise with the fields in Gold-Vision Account.
When complete click the Save button.
 Info
Info
Please Note – where a list of options is available you can choose to hide selected options.
Adding Page Sublists
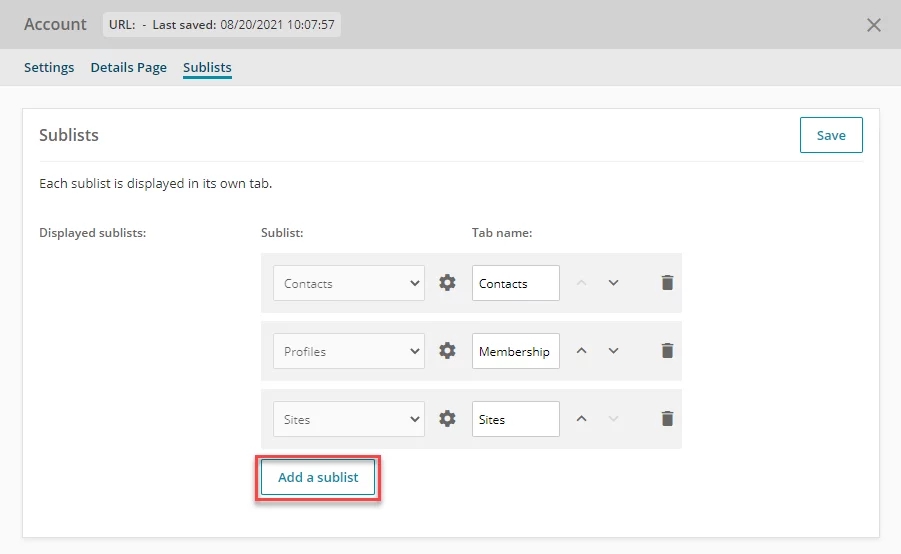
You can add additional tabs to display Contact, Site and/or Profile details on the Account portal.
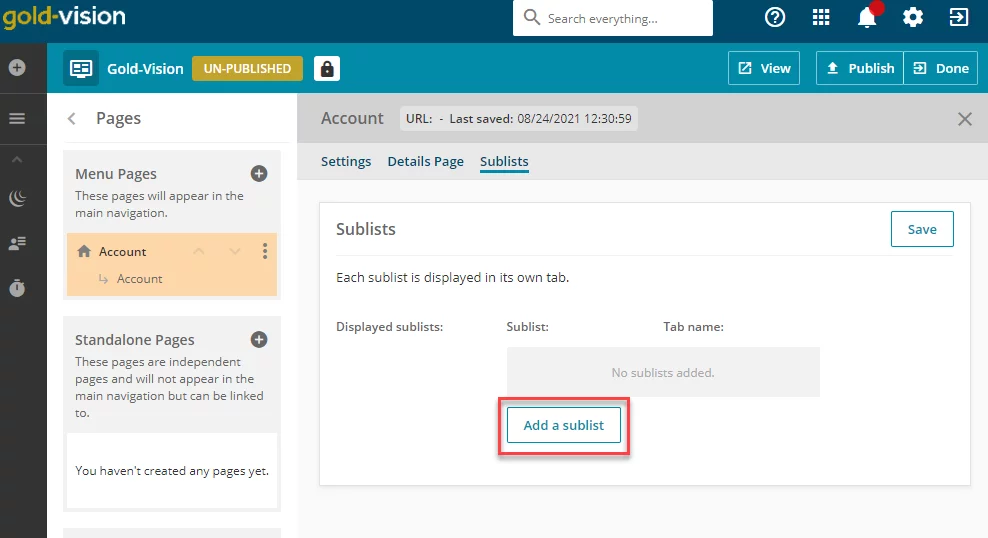
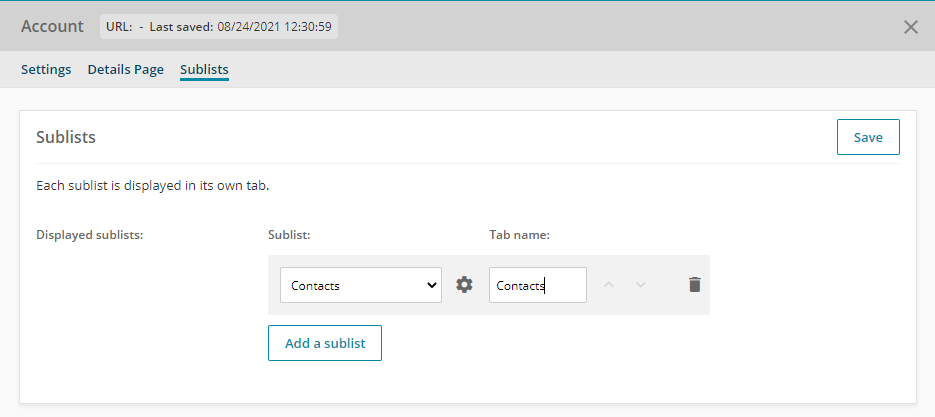
Click on the Sublists tab then click the Add a sublist button, select the sublist option required.
Enter the Tab name which will display in the Account Portal.
For each option you can go into Settings to Configure Sublist
Configure Sublist
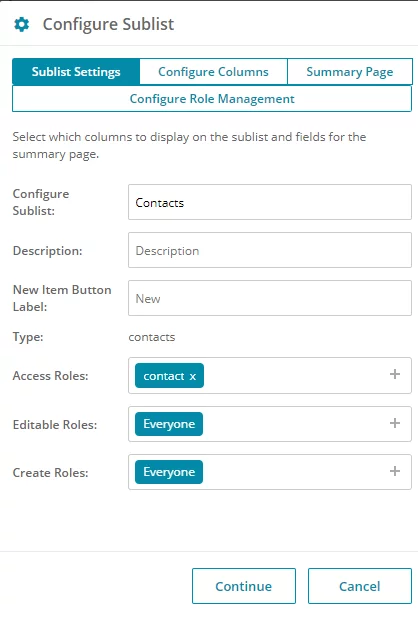
The Sublist Settings tab will be displayed.
Configure Sublists – the sublist name will be displayed and can be amended.
Description – enter or amend the description.
New Item Button Label – you can amend the new item button label if required.
Type – the sublist type will be displayed by default.
Access Roles – allows you make the space visible to contacts with the user roles selected.
Editable Roles– allows you make the space editable to contacts with the user roles selected.
Create Roles – allows contacts with the user role selected to create new roles.
Click the Continue button to save or click the Configure Columns tab to add columns to the sublist and fields to the summary page.
Configure Columns
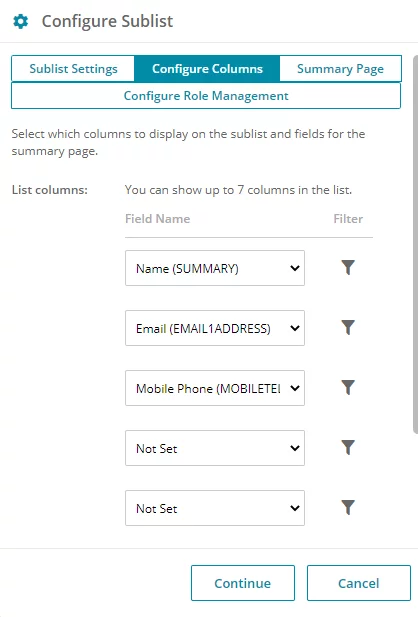
You can add Columns to the list and set filters.
Click to select the Field Name required.
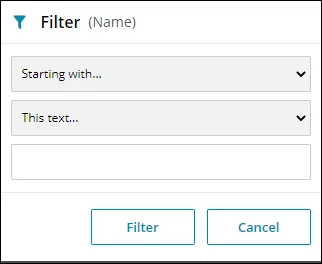
You can then click on the Filter Icon to set a default Filter against each field if required.
For example – add an example of a filter.
Click the Continue button to save or click the Summary Page tab to add fields to the summary page.
Summary Page
You can add additional fields to display on the summary page.
Default Fields – the Default Field Name will be displayed and you can click the toggle to make the fields editable.
Additional Fields – click on Add Field button to select additional fields and set the editable option as required. The fields will appear in the ‘Portal tab’ and will synchronise with the fields in Gold-Vision Account.
Click to select the field names required and click on Continue to save.
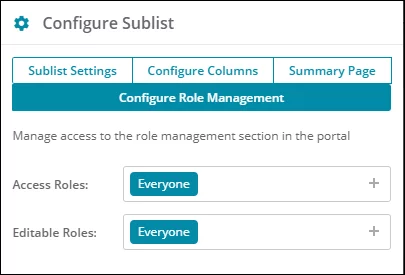
Configure Role Management
This option is only available on the Contacts sublist and allows you to manage access to the role management section in the portal.
Access Roles – allows you make the role management area visible to contacts with the user roles selected.
Editable Roles – allows you make the role management area editable to contacts with the user roles selected.
Click the Continue button and then the Save button.




 Related articles