User Configuration – Cloud Hosting
Licence Settings
 Info
Info
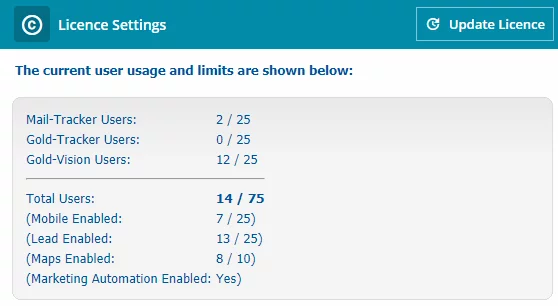
Before setting up a new user you will need to check that you have enough licences, or you can free up a licence by disabling a user.
You can view the number of licenses by selecting Settings, Licence Settings.
Setting up a New User
If we host your Gold-Vision in the Cloud please complete our online user request form with the following details so we can setup the new user and confirm any subscription changes.
- Your email address (for us to locate your account correctly)
- The name and email address of the new user
- If they require a Professional or Essentials licence
Login and User Level
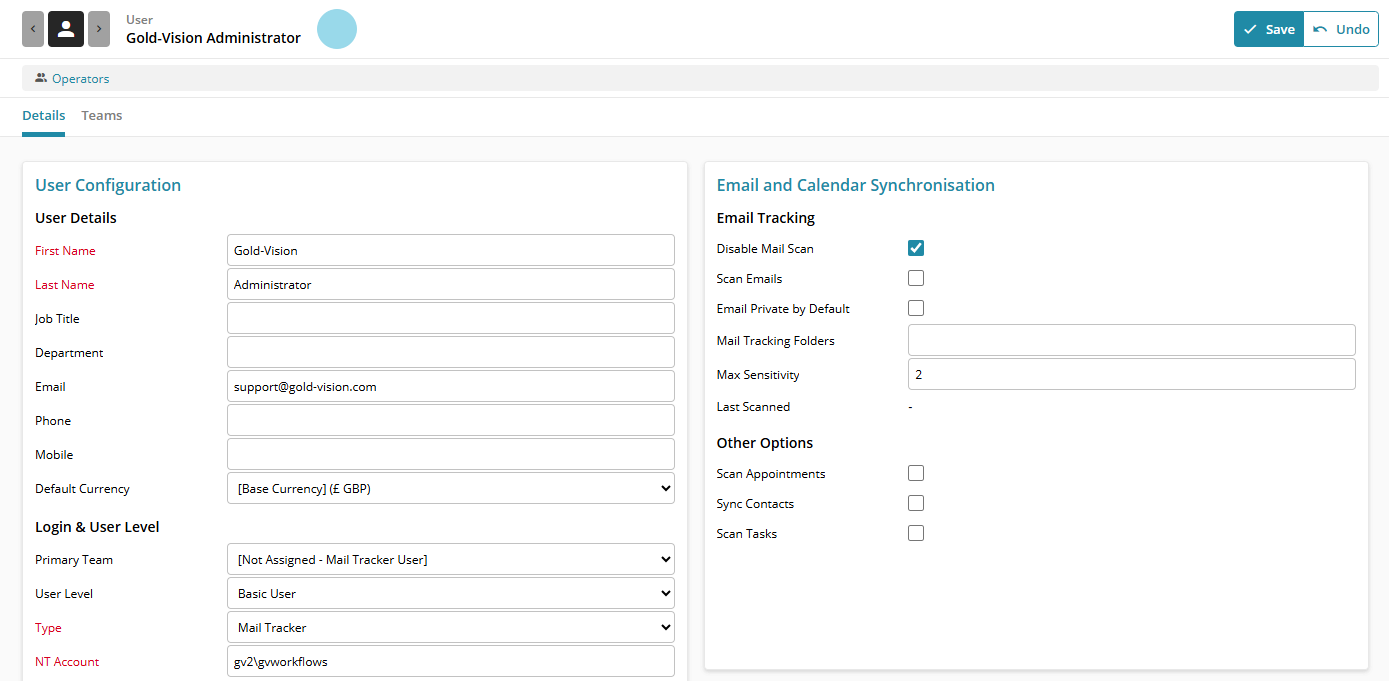
Before your user can access Gold-Vision you need to assign them to a Primary Team and change their User Level to match your licence request. Go to Settings/Users and locate the new user, open the record, put it into edit mode using the pencil icon at the top right.
Primary Team can be found in the Login & User Level section on the left hand side. Change the Type from ‘Mail Tracker’ to either a Professional or Essentials licence as you requested.
If you want the user to be a Config Manager or a System Administrator then you can change their User Level in the same section.
Secondary Team(s)
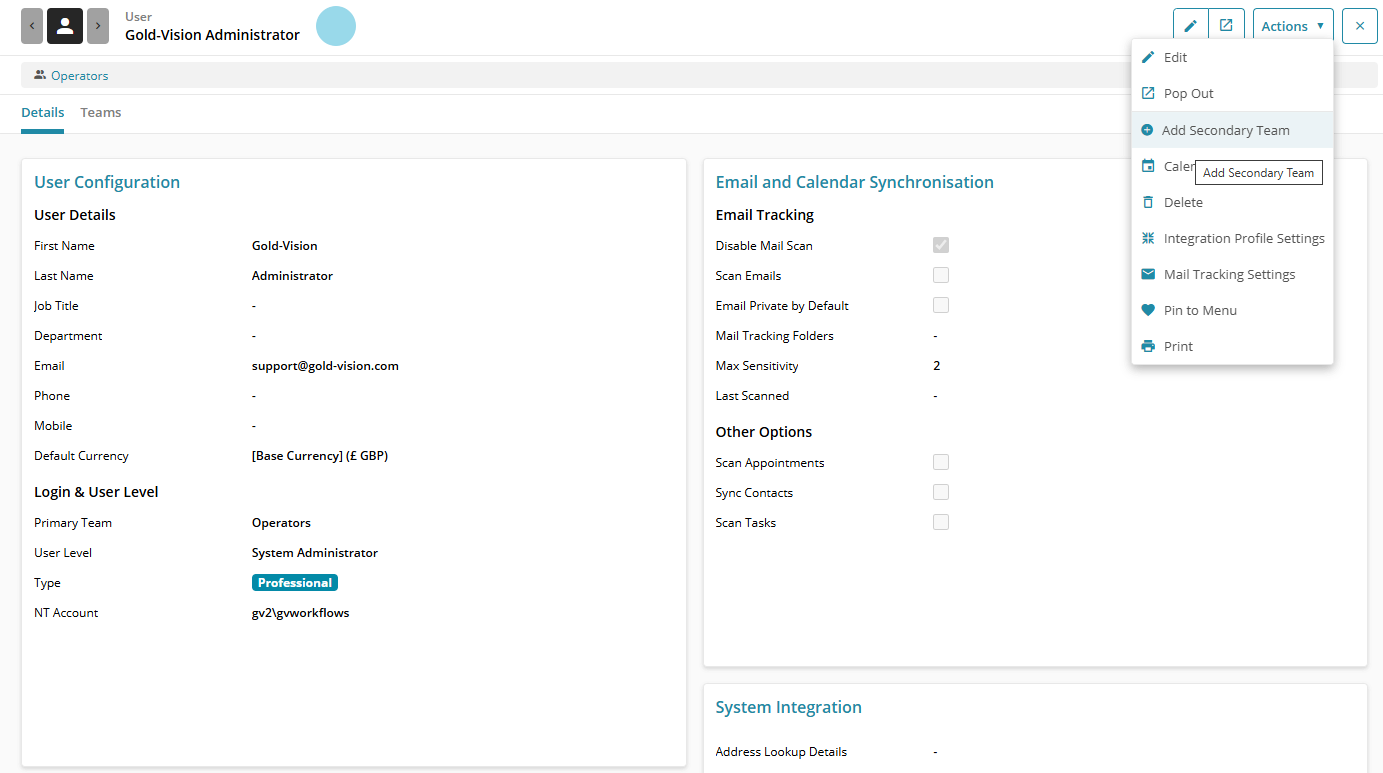
You may also wish to assign that user to one or many secondary teams. To do so, click on Actions at the top right and choose ‘Add Secondary Team’.
Mail Tracking
If your business currently uses Mail Tracking in Gold-Vision which you wish to add for this user, then untick the Disable Mail Scan checkbox and tick the Scan Emails checkbox. Put an asterisk (*) into the Mail Tracking Folders box and Save.
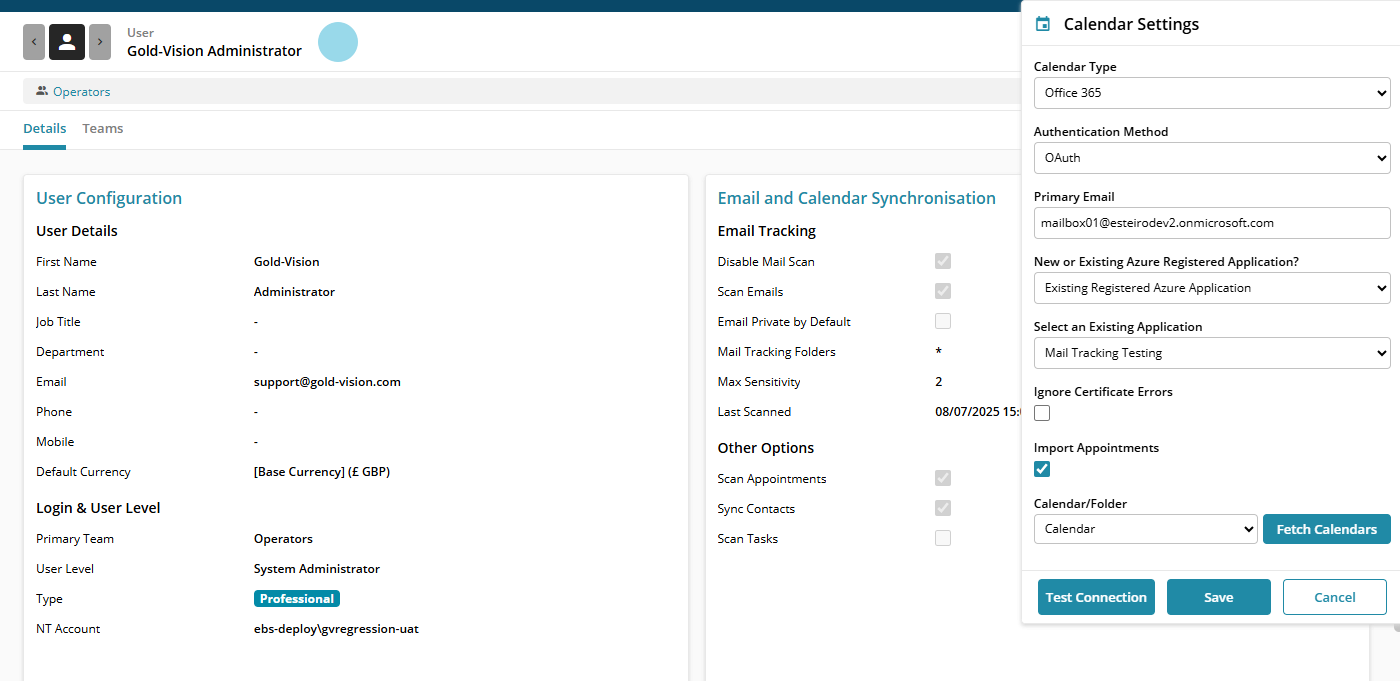
Then open the Actions menu and choose Mail Tracking Settings. Choose OAuth for O365 and put the user’s email address into the Mailbox Username/Alias. Your Existing Registered Azure Application should already be shown, so you can Save.
 Tip
Tip
If you haven’t already got email tracking and calendar syncing set up for Gold-Vision then see Configuring Modern Authentication for Office 365 and Configuration of Calendar Settings for Office 365.
Calendar Sync
If you also wish to add Calendar Syncing for this user then ensure you have checked the ‘Scan Appointments’ box on the user record, then open the Actions menu and choose Calendar Settings and choose OAuth for O365 and put the users email address into the Primary Email box, using the Existing Registered Azure Application. Tick to import appointments and click Fetch Calendars and Save.
 Related articles