Configuring Gmail Calendar Synchronisation – Basic Authentication
Overview
Please note: For information on configuring Gmail Calendar with Modern Authentication, please click here.
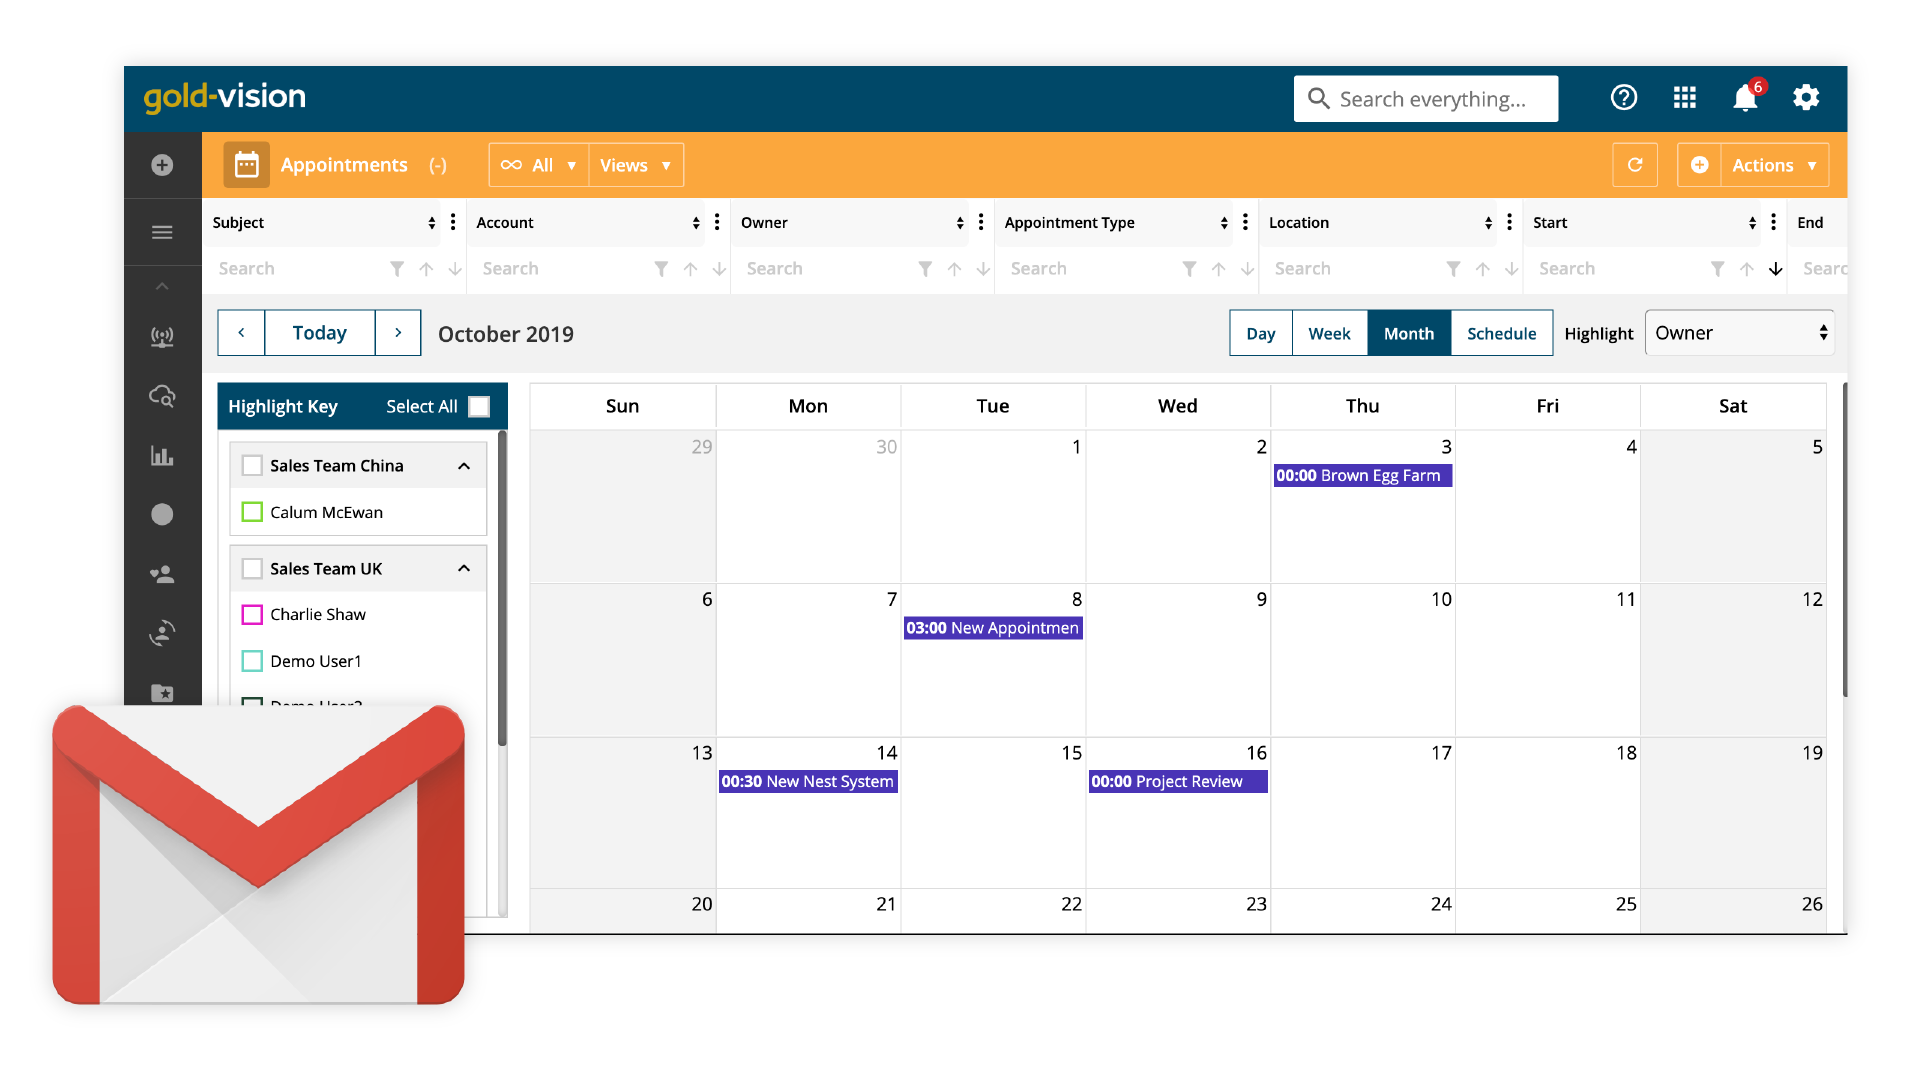
Gold-Vision allows integration with your Gmail mailbox.
- Enable Calendar Synchronisation to form a two-way link between Gold-Vision and Gmail Appointment creation and management.
Configuring your Gmail Integration
There are 2 options available when setting up your Gmail integration with Gold-Vision:
(Option 1) Create a service account for each user which has permissions to their calendar
(Option 2) If G Suite domain is used, you can create a domain service account and grant it domain wide authority. More information on this setup can be found here.
Setting up a Service Account for each user (Option 1)
- Log in to Google developer console (as the user): https://console.developers.google.com
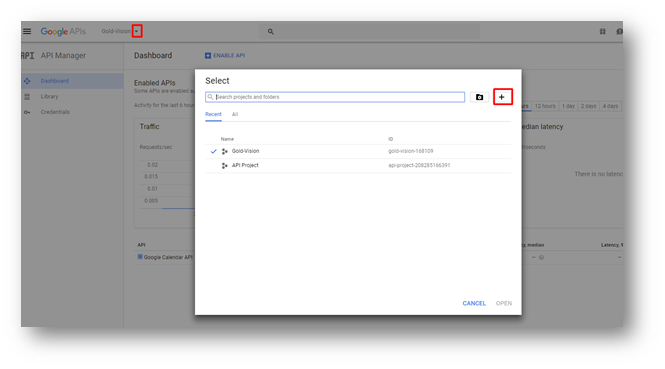
Ensure you have the Project selected in the dashboard
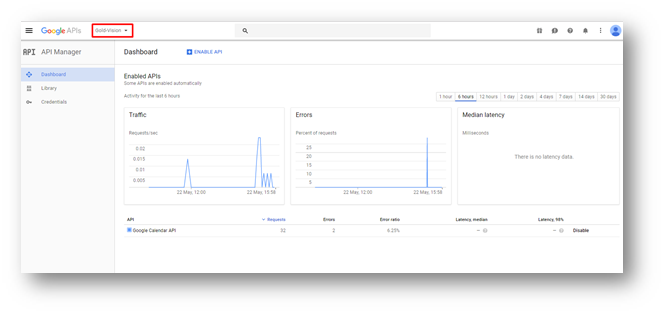
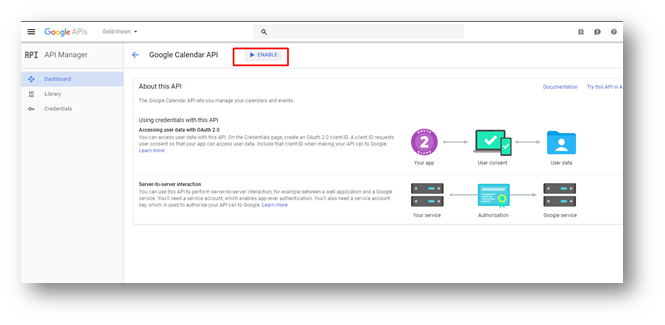
Enable the Google Calendar API
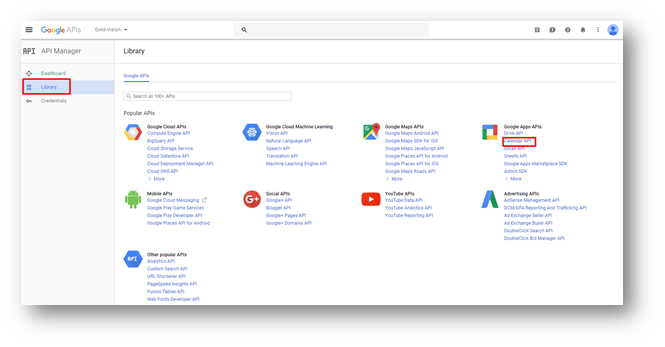
Browse to Library → Calendar API → Click Enable
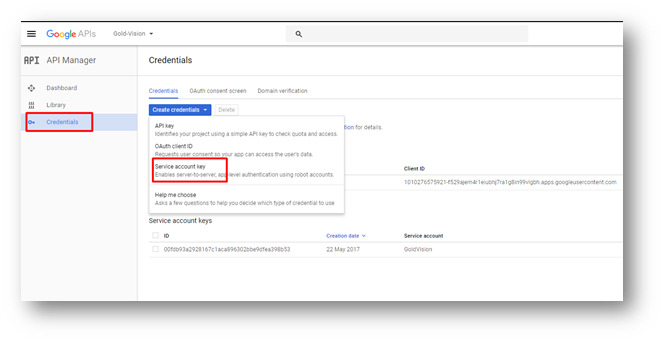
Setup the Service Account and generate Private Key
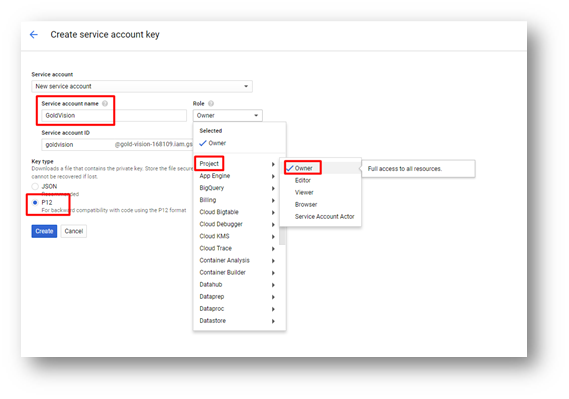
Navigate to ‘Credentials’ → Create Credentials → Click on Service Account Key → enter GoldVision in the Service Account Name → Set the Role to Project Owner → Set Key Type to P12 → Click ‘Create
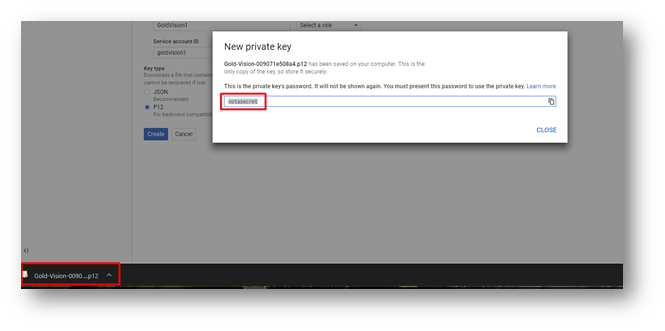
The .p12 Key will download (Save this somewhere safe). You will also be presented with the Private Key password (Copy and store in a safe location)
Obtain the Service Account Username
After you have created the service account and generated a new private key (as per above steps) you will need to obtain the service accounts username:
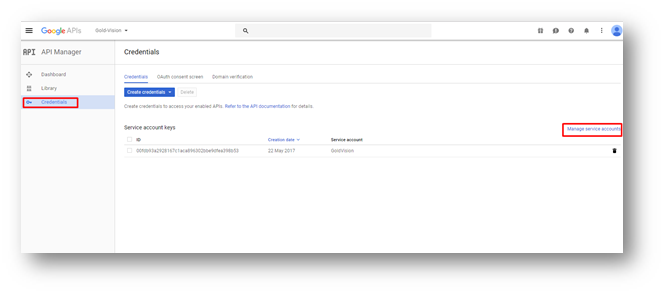
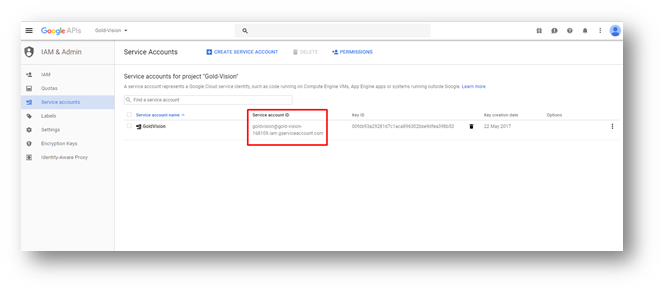
Go to ‘Credentials’ → Manage service accounts → Copy the Service Account ID (This is the Service Accounts Username)
Set permissions on the users calendar
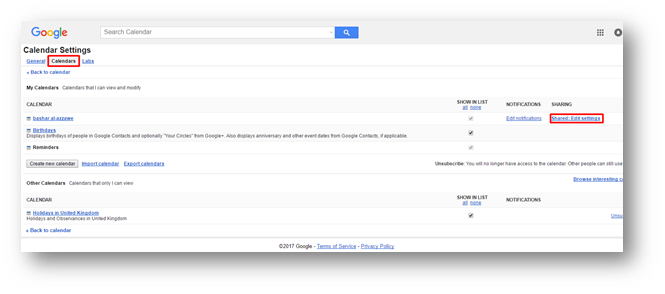
Go to https://calendar.google.com and login as the user
Click the cog symbol → Select settings from the options → Click Calendar and then ‘Shared – Edit Settings’

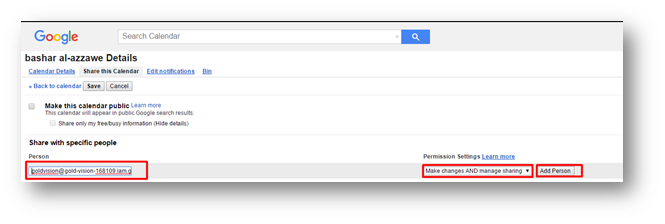
Add the service account email address: e.g. goldvision@gold-vision-168109.iam.gserviceaccount.com
Set the permission settings to ‘Make and Manage sharing’ → Save
Set calendar settings in Gold-Vision admin console
(In Gold-Vision)
Settings → Users → Click on a User → Click Actions → Select ‘Calendar Settings’
Set the fields with the following values:
Calendar Type : Google
Primary Email : This is the service account username not the users email address.
Password : This is the service account password.
OAuth Certificate : You will need to upload the private key you obtained.
Click on Test → Should receive ‘Success’.
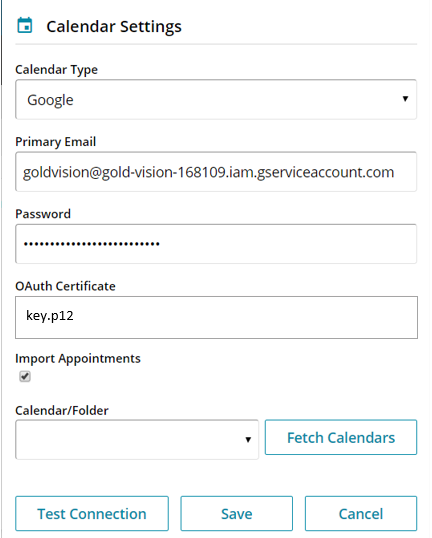
The users calendar should appear in the Calendar/Folder field. → Save changes.
 Related articles