Configuring the Generic Phone Integration
Introduction
The generic phone system integration allows click-to-dial capability for HTTP-based CTI phone systems from within Gold-Vision. Phone systems that are supported by this integration must offer a RESTful endpoint for making a call that is pre-authenticated to the current user.
Overview
There are five steps involved in setting up a Generic Phone integration, summarised below.
- Enabling the Generic Phone Integration
- Configuring the Dialler URL
- Enable Users
- Configure User Settings
- Testing .
1. Enabling the Generic Phone Integration
The first step is to install and enable the Generic Phone integration through the storefront.
- Open the Settings menu
- Click on Integrations
- The integrations store front will load
- Find and click on Generic Phone
- Click the Install button
- Follow the on-screen install instructions until install is complete
- Next you will need to enable the integration
- Select the “Manage” tab under the integration area
- Click Configure next to the Generic Phone integration
- Check the Enabled box
- Save
 Tip
Tip
If you later need to check or change the integration you can do so by under the ‘Manage’ tab of the integrations store front.
2. Configuring the Dialler URL
Next you will need to configure the URL that is called by Gold-Vision to dial the number. There is a token system that can be used as below.- Open the Settings menu
- Click on Integrations
- Select the “Manage” tab
- Click Configure next to the Generic Phone (CTI HTTP) integration
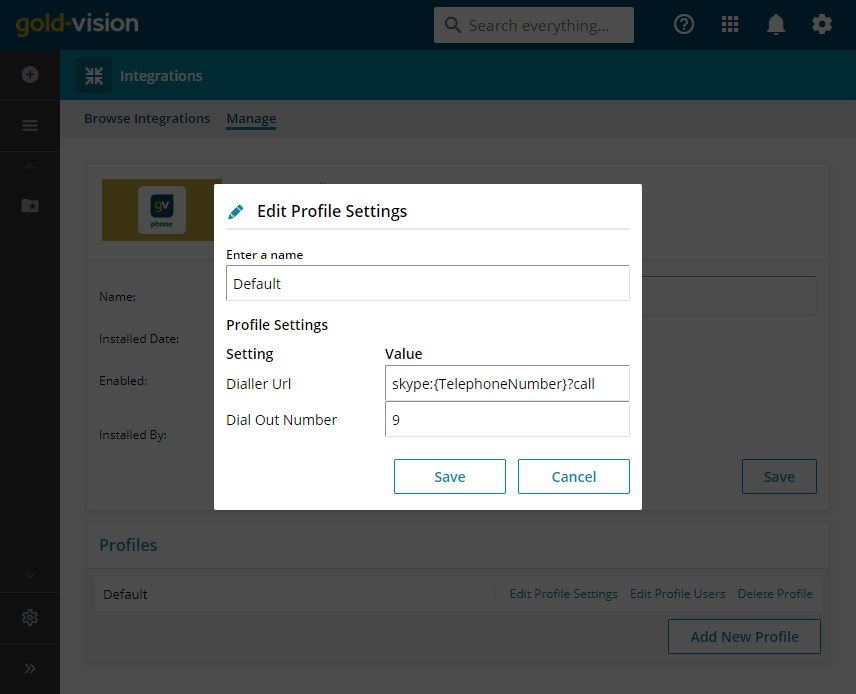
- Against the Default Profile select Edit Profile Settings
- Enter the Dialler URL using the below parameters as required
- {TelephoneNumber}
- {Extension}
- If a number is required for an outside line enter this in the Dial Out Number
- Save
3. Enable Users
The next step is to enable which users can use the phone system.- Open the Settings menu
- Click on Integrations
- Select the “Manage” tab
- Click Configure next to the Generic Phone (CTI HTTP) integration
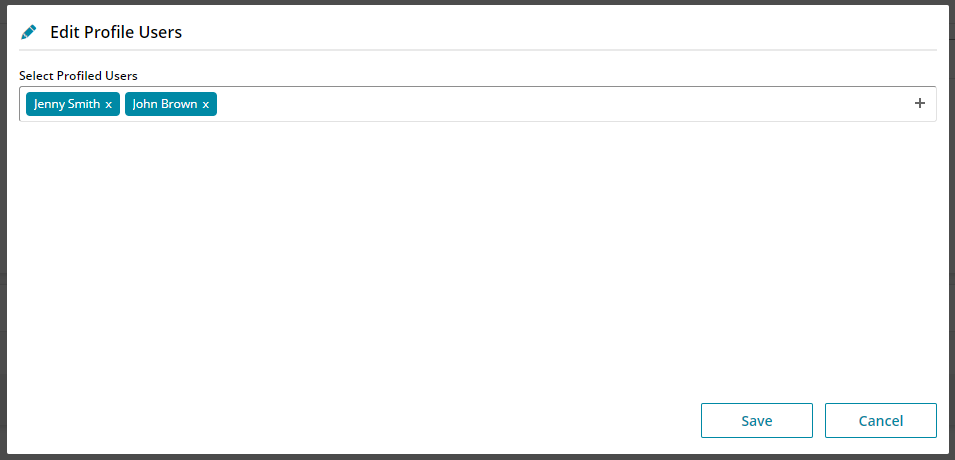
- Against the Default Profile select Edit Profile Users
- Select the Users to enable
- Save
4. Configure Users
The final setup step is to configure each user in terms of the selected phone system and any extension settings that are required.- Open the Settings menu
- Click on Users
- Select a User’s Name to to open the user record
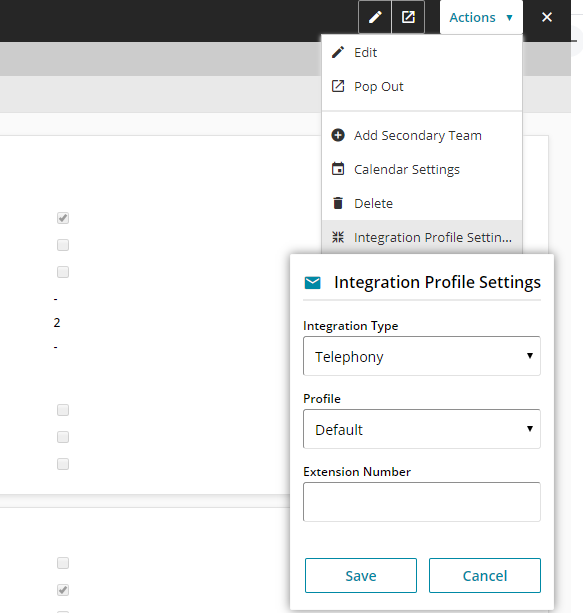
- Open the Actions menu
- Select Integration Profile Settings
- Select Telephony then Default from the dialog
- Enter an Extension number (optional)
- Save
5. Testing
To test the integration follow the steps below.- Enable the phone integration for your own user following steps 3 and 4 above
- Open the Contact list (from the view menu )
- Click on a contact phone number
- Phone phone system should dial out


 Related articles