Configuring Loqate Email Validation
Overview
The Loqate integration is quick and easy to setup and enables users to search for and validate email addresses directly from within Gold-Vision. In order to setup the integration you will require your Loqate Account Number and Licence Key. To find out more about Loqate or obtain a license please click here.
Enable Loqate for Email Validation
The first step is install the Loqate Integration from our storefront.
- In Settings select Integrations
- Select Loqate Data Validation
- Install
Configure Settings
Click on Manage against Loqate once installed to see the Settings:
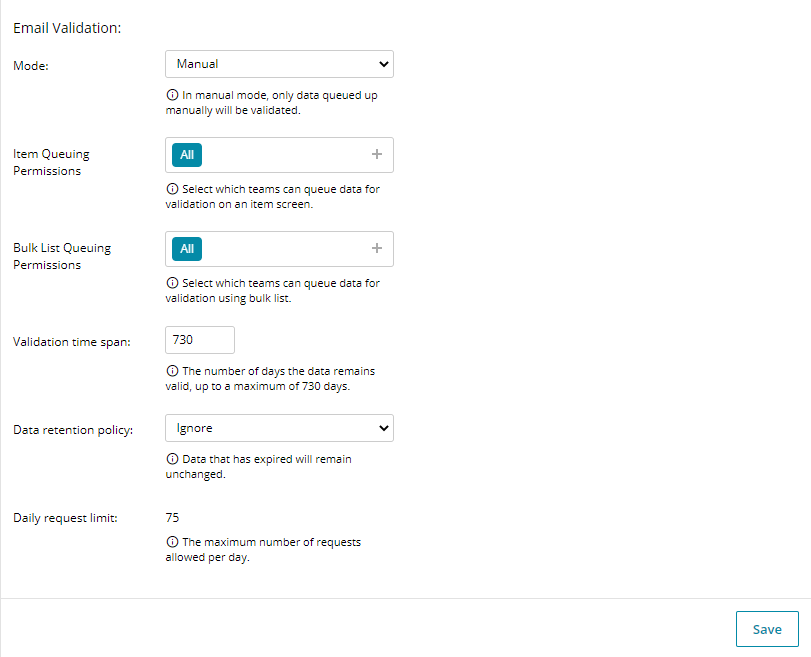
Mode
Choose from Manual – initiated by a user either on a single or group of email addresses, or Automatic email verification.
Item Queuing Permissions
Control which user team can manually initiate email verification from an email field
Bulk List Queuing Permissions
Control which user team can manually initiate email verification from the contact or lead lists
Validation time span
Up to 730 days, set a time period for which an email address remains valid
Data retention policy
A setting to control what happens when a validation has expired; Ignore means it remains validated, Revalidate will automatically revalidate it and Purge will remove the validation record against that address.
Daily request limit
Set how many requests can be sent daily.
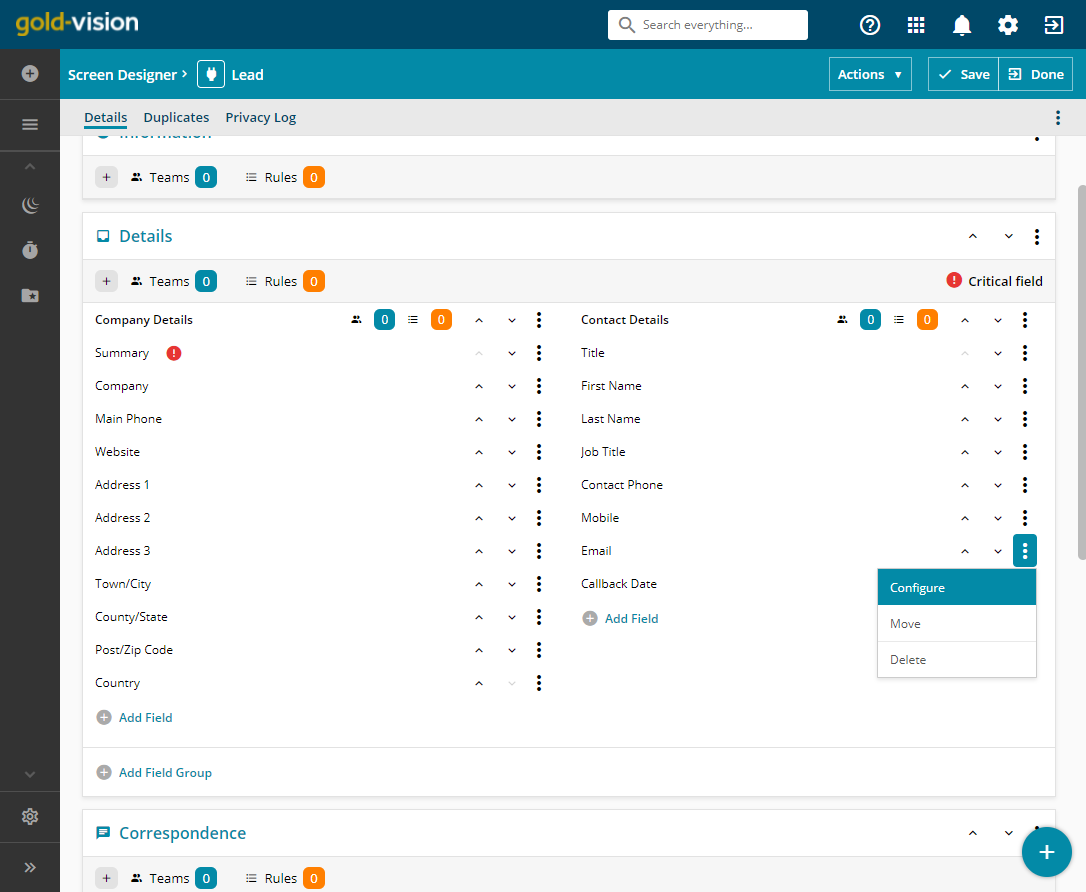
Screen Design
For Contacts, in Settings / Screen Designer / Contact locate your email field or fields that you wish to use for validation.
Make sure their type is set to Email and there is a tick in the Validatable option.
Similarly, do the same in the Screen Designer for Lead Lists.
To do this in Settings / Screen Designer / Lead List locate the List required and open. Locate the email field or fields that you wish to use for validation.
Make sure their type is set to Email and there is a tick in the Validatable option.
You’re now ready to validate your email addresses. Go to Using Loqate Email Validation to find out how to use it.
 Related articles