Hurrah! After capturing a lead and nurturing it up to the crucial purchase decision, you’ve won a new customer! Great news! So, that’s that for marketing automation, right? Wrong!
Many Marketing Automation solutions position themselves as a ‘lead only’ tool. The main reason for this is they run inside their own product database, separate to CRM. Once a lead has become a customer, typically it would move out of the Marketing Automation solution and into CRM. But it doesn’t have to be this way.
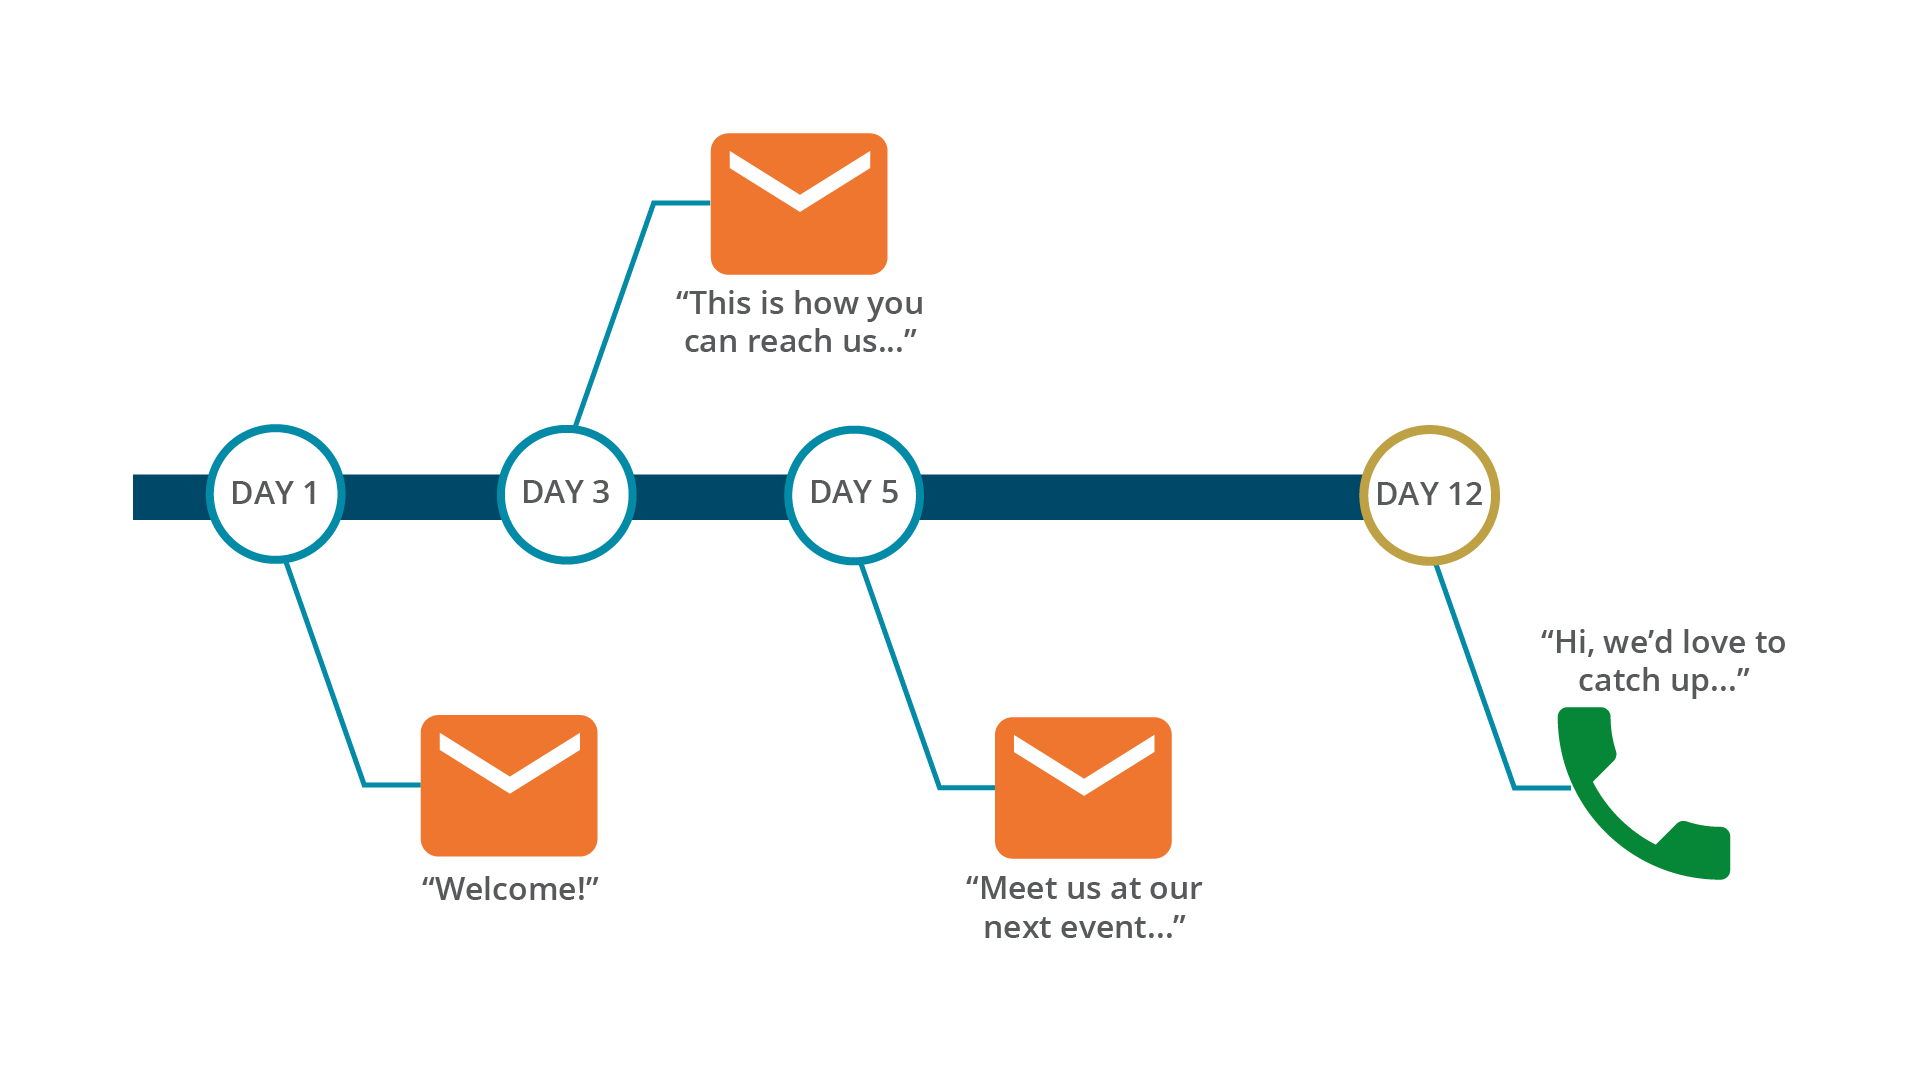
Gold-Vision is a truly integrated solution. What this means is that once your lead has converted into a customer you can still use automation! One common requirement when onboarding new customers is to run a welcome series such as the example below:
Running a Welcome Email Series
The series includes a welcome email, an introduction to help and support contact details, an event calendar and finally a follow up call from their Account Manager. By ensuring that you have set up and started your automated email templates in Gold-Vision Connect, it takes just minutes to set up your Welcome Campaign.
Set up your automated Campaign. Create a Campaign Source of your customers by filtering a list in Gold-Vision.
Tip
Be conscious to create a Source that will only include customers from the date you would like your Campaign to start on, to avoid sending all of your existing customers the welcome series when you turn it on
Create a new Campaign and create your first Campaign Stage named Welcome Email with the Media type set to Connect Email and add the Source that you have created that contains your customers.
Run your stage using an Automated Run, choose your automated template from the drop down options, and set a start and end date. This Campaign Stage only runs to New Recipients, every hour at 30 minutes past. This means that any new customer will automatically be added to this Campaign Stage, and sent a Welcome Email within an hour of becoming a new customer in Gold-Vision.
Add in 2 more Connect follow-up stages for the contact details and event calendar, and make then add the following rules to each:
1) Send to Sent Recipients only (will set automatically as default)
2) Delay Sending by 2 days.
This will ensure that your new customers will receive each follow-up stage two days after the previous email. Set up the automation by running your Stages using Automated Run and choose your time of day to send, when to start and end the Campaign, and select your automated email template from the drop-down list.
Step 3
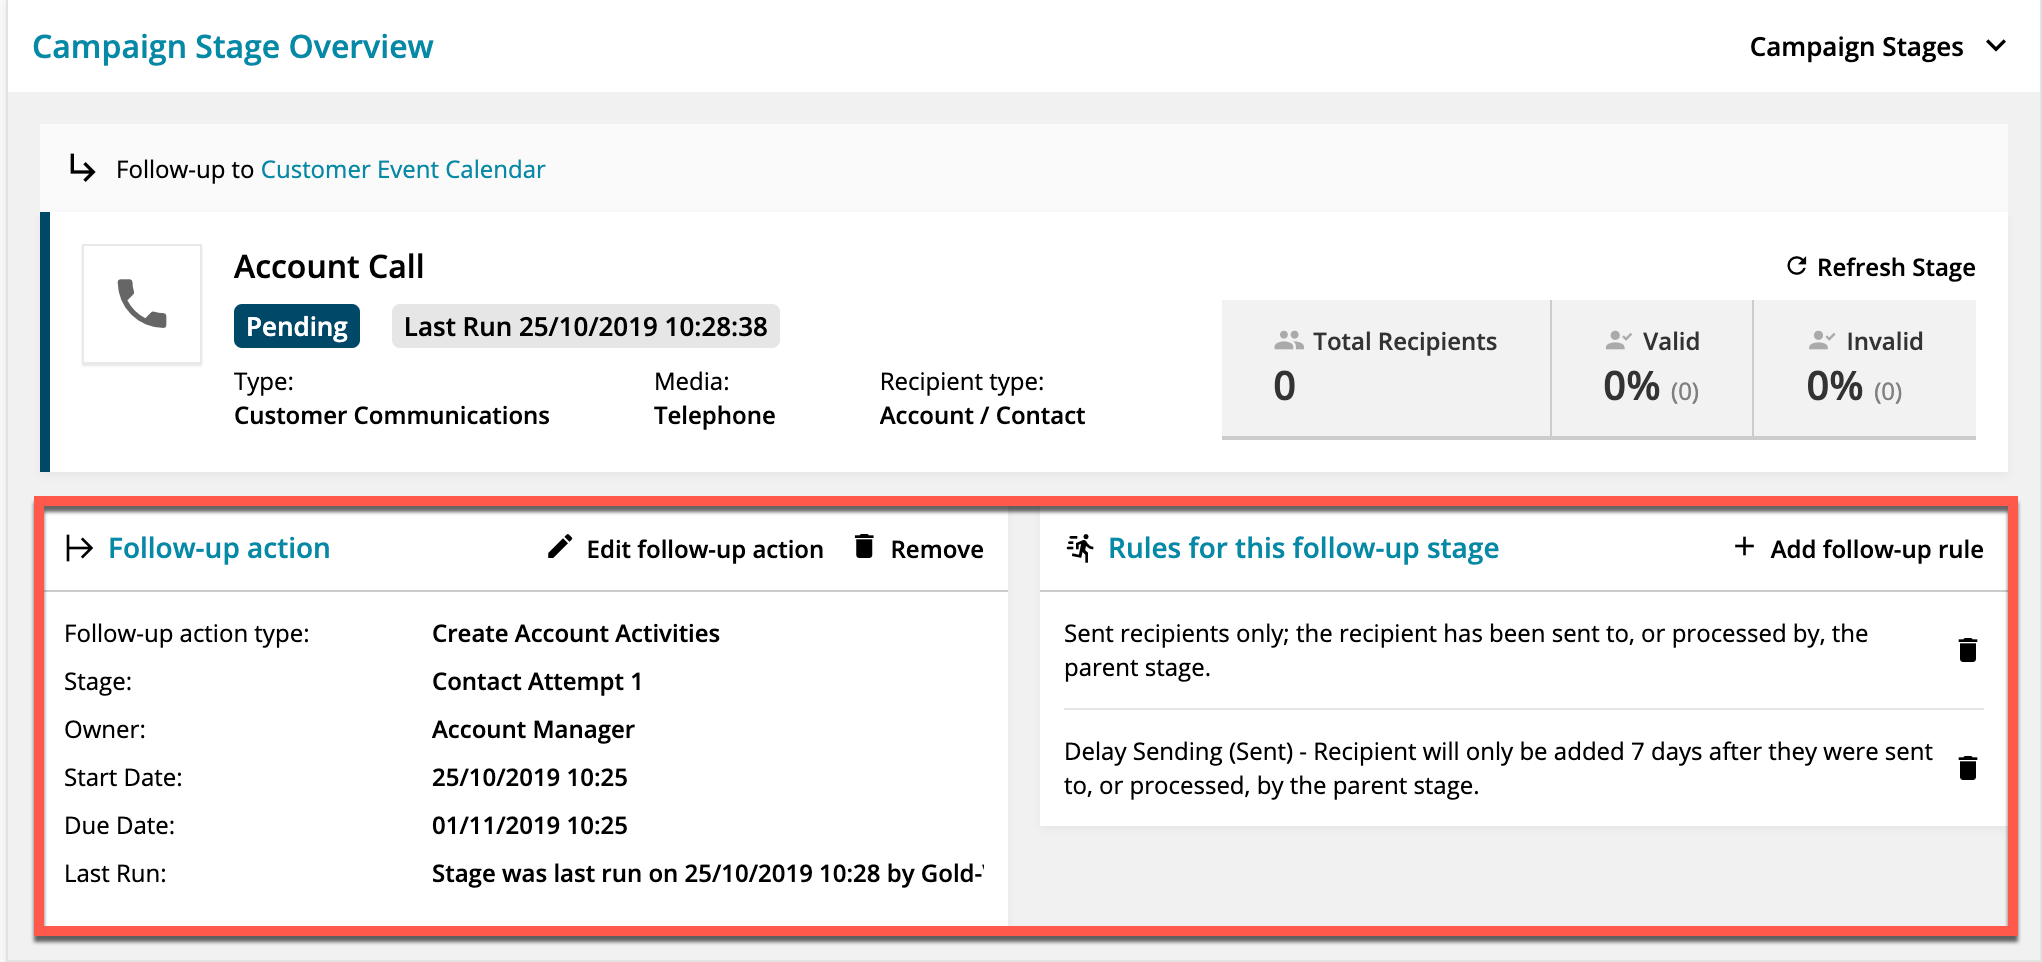
Finally, add in your final follow-up stage. This time select Phone as your Media type, add your rules (this time we delay the final Stage by 7 days) and a follow-up action, setting up the kind of activity you would like to occur.
For instance, we’ve set the follow-up action to Create Account Activities for the Account Manager. This means that, every time this stage is run the Account Manager for every new customer will receive an Account Activity for them to call their customer 7 days after they receive the event calendar email.
Finally, run your Phone stage using Automated Run to set up the automation, we’ve set ours to run Daily at 10am.
We use persistent cookies that stay on your computer or device after the browser has been closed and last for a period of time specified in the cookie. We use these cookies for remembering your language preference and to provide you with the best possible user experience. By clicking “Accept”, you consent to the use of all cookies.
This website uses cookies to improve your experience while you navigate through the website. Out of these, the cookies that are categorized as necessary are stored on your browser as they are essential for the working of basic functionalities of the website. We also use third-party cookies that help us analyze and understand how you use this website. These cookies will be stored in your browser only with your consent. You also have the option to opt-out of these cookies. But opting out of some of these cookies may affect your browsing experience.
Necessary cookies are absolutely essential for the website to function properly. These cookies ensure basic functionalities and security features of the website, anonymously.
Cookie
Duration
Description
cookielawinfo-checbox-analytics
11 months
This cookie is set by GDPR Cookie Consent plugin. The cookie is used to store the user consent for the cookies in the category "Analytics".
cookielawinfo-checbox-functional
11 months
The cookie is set by GDPR cookie consent to record the user consent for the cookies in the category "Functional".
cookielawinfo-checbox-others
11 months
This cookie is set by GDPR Cookie Consent plugin. The cookie is used to store the user consent for the cookies in the category "Other.
cookielawinfo-checkbox-advertisement
1 year
The cookie is set by GDPR cookie consent to record the user consent for the cookies in the category "Advertisement".
cookielawinfo-checkbox-necessary
11 months
This cookie is set by GDPR Cookie Consent plugin. The cookies is used to store the user consent for the cookies in the category "Necessary".
cookielawinfo-checkbox-performance
11 months
This cookie is set by GDPR Cookie Consent plugin. The cookie is used to store the user consent for the cookies in the category "Performance".
viewed_cookie_policy
11 months
The cookie is set by the GDPR Cookie Consent plugin and is used to store whether or not user has consented to the use of cookies. It does not store any personal data.
Functional cookies help to perform certain functionalities like sharing the content of the website on social media platforms, collect feedbacks, and other third-party features.
Cookie
Duration
Description
pll_language
1 year
This cookie is set by Polylang plugin for WordPress powered websites. The cookie stores the language code of the last browsed page.
Performance cookies are used to understand and analyze the key performance indexes of the website which helps in delivering a better user experience for the visitors.
Cookie
Duration
Description
YSC
session
This cookies is set by Youtube and is used to track the views of embedded videos.
Analytical cookies are used to understand how visitors interact with the website. These cookies help provide information on metrics the number of visitors, bounce rate, traffic source, etc.
Cookie
Duration
Description
_ga
2 years
This cookie is installed by Google Analytics. The cookie is used to calculate visitor, session, campaign data and keep track of site usage for the site's analytics report. The cookies store information anonymously and assign a randomly generated number to identify unique visitors.
_gid
1 day
This cookie is installed by Google Analytics. The cookie is used to store information of how visitors use a website and helps in creating an analytics report of how the website is doing. The data collected including the number visitors, the source where they have come from, and the pages visted in an anonymous form.
Advertisement cookies are used to provide visitors with relevant ads and marketing campaigns. These cookies track visitors across websites and collect information to provide customized ads.
Cookie
Duration
Description
IDE
1 year 24 days
Used by Google DoubleClick and stores information about how the user uses the website and any other advertisement before visiting the website. This is used to present users with ads that are relevant to them according to the user profile.
test_cookie
15 minutes
This cookie is set by doubleclick.net. The purpose of the cookie is to determine if the user's browser supports cookies.
VISITOR_INFO1_LIVE
5 months 27 days
This cookie is set by Youtube. Used to track the information of the embedded YouTube videos on a website.
 Info
Info  Tip
Tip 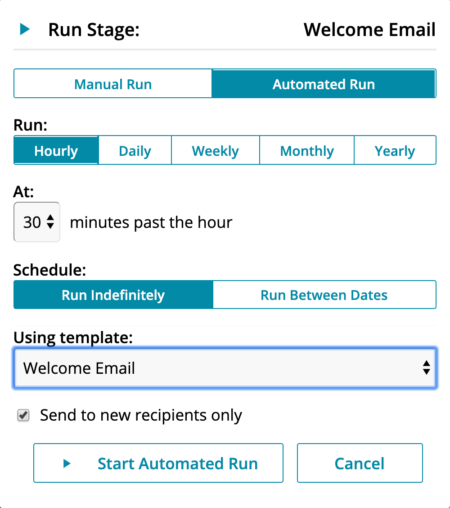

 Related articles